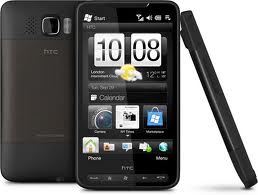
Linux Bootloader for HTC HD2

HTC HD2 ToolBox & Hot BootLoader
Username and password for linux: root / toolbox

Use this application and every part of this package at your own risk. Always backup data on your phone, we recommend Titanium Backup assuming your phone is rooted since it should be anyways for this to work.

Installation instructions:

  1. Download all required files. (removed by source)
  2. Put folder linux on your sdcard (/sdcard/linux/linux.img).
  3. Put HD2-ToolBox.apk on your sdcard and install it
  4. Read everything
  5. When app asks for root access grant it (it will not work without root access).
  6. You must have root access, busybox, writable /system/bin folder and init.d support.
  7. After everything is done reboot phone (necessary for HBL service daemon).

To start linux go to Hot BootLoader screen and press one of the buttons! I recommend to read Help first (it on same screen) and linux should be on screen


Original Thread can be found at: http://forum.xda-developers.com/showthread.php?t=1095726
Developers Donation link: http://bit.ly/iySu3J


Unlocked Bootloaders on Sony Ericsson Phones

Sony Ericsson has been talking about leaving their bootloaders unlocked for a while now.  Sony Ericsson was one of the first companies to announce leaving their bootloaders unlocked on their devices.  They even have instructions on their website showing users how to unlock bootloaders.  When it was first brought to our attention they were going to unlock bootloaders we were excited seeing as the other competition Motorola and HTC had not mentioned this at all.  Of course now HTC has announced their bootloaders will no longer be locked.

Sony Ericsson also went on to say that their handsets, even when unlocked, would continue to receive regular firmware/software updates from Sony Ericsson whenever they were made available. Under one condition. The device had to be running the stock Sony Ericsson software.

Well, it looks like SE may be doing a little backpedaling adding new stipulations to their previous stance. They are now saying that once the bootloader is unlocked, you will NOT be receiving regular firmware updates from Sony Ericsson. While this sounds like a bad move, they actually have a pretty good reason for doing so. Sony Ericsson explained that because they have no way of knowing what software a user will install on their device, it makes it nearly impossible for them to give their customers 100% certainty that an update will be compatible. That actually makes perfect sense.

The issues still lay in the fact that while you will soon be able to install custom ROM’s on your Sony Ericsson phone with an unlocked bootloader but currently have no way or restoring your phone back to a stock state.  This being said I have faith in the Android Community to come up with a Flash for these phones even though Nexus One users may argue that fact.


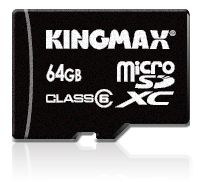
64GB microSD Card by Kingmax

Kingmax has just revealed the world’s largest capacity microSD. Sure we have 32gb microSD’s that are readily available, and thats nothing to sneeze at. But, come on! A 64gb microSD card? Thats whole lot of storage for a mobile device. Yet, with all the advances in the mobile computing/smartphone industry, there are those of us out there, that could certainly benefit from an SD card of this size. Right now though, you’ll be hard pressed to find a mobile device, with the hardware to support the 64GB microSDXC from Kingmax. And don’t run out searching for this monster card, as it hasn’t yet been released. But definitely keep your eyes peeled for the up and coming Android devices that will take full advantage of this new card.

KINGMAX Unveils World’s Largest Capacity 64GB Micro SD Card:
Wide Application , Perfect for High-End Mobile Devices

KINGMAX has implemented the 9 Stacked Die technology for this Class 6 micro SD card. It complies with the latest SD3.0 and Class 6 specifications but is also compatible with SD Card Association’s SD2.0 specification. Although it comes in a compact size, it definitely satisfies consumer’ needs for massive multimedia data storage. Simply plug the micro SD card into mobile devices and one can instantly enjoy the convenience of memory expansion. Whether it is high-resolution or video clips, photos, mp3 files, mobile games or multimedia downloads; the 64GB micro SD card makes entertainment on-the-go possible. Moreover, with the help of an adapter, KINGMAX’s micro SD card can also be used as a SD card or USB flash drives. With its wide ranging applications from digital cameras, multimedia players, PCs, PDAs, card readers to printers, this multi-purpose tiny memory card is definitely a great value buy!

KINGMAX’s micro SD card has a built in Error Correction Code (ECC) which acts through controller to auto detects and reconstructs lost data during transmission to ensure reliable data transfer. In addition, micro SD comes with Wear leveling algorithm function which allocates all the information into different areas in the memory card to increase each area’s average usage and helps to maximize product lifetime. From multimedia files, address book, business applications to personal data, KINGMAX’s mega-capacity 64GB micro SD card makes files storage fast and easy; enabling consumers to enjoy quality and convenient on-the-go experience.

All of KINGMAX’s micro SD cards have been approved by various safety and environmental standards including CE, FCC, and RoHS; they have also been certified compatible with major OS. KINGMAX is proud to say all of its products are subjected to the most stringent quality control; all products go through rigorous testing to ensure product quality. And finally, all microSD products come with lifetime warranty to provide 100% satisfaction guarantee to customers

Product Feature:

  • High compatibility & reliability
  • Ultra fast transfer rate
  • plug and play

Product specifications:

  • SD3.0
  • Capacity:64GB
  • Speed:Class6
  • Dimension:15 mm x11 mm x1.0mm
  • Wear leveling algorithm to maximize product lifetime
  • Built-in Error Correction Code that auto corrects data
  • Energy efficient, extends mobile devices’ battery lifetime


Original Article can be found at: http://www.talkandroid.com/41878-thats-a-whole-lot-of-storage-kingmax-unveils-the-first-ever-64gb-microsd-card/


BusyBox Embedded Linux App

Busy Box is something that you install on your Android Device to give you some additional handy LINUX / UNIX based commands. You need Busy Box installed because some commands are not available to you and you made need them for some root level tasks. Here is some info on what Busy Box is.


scan busybox qr code
Scan BusyBox Code To Download


BusyBox combines tiny versions of many common UNIX utilities into a single small executable. It provides replacements for most of the utilities you usually find in GNU fileutils, shellutils, etc. The utilities in BusyBox generally have fewer options than their full-featured GNU cousins; however, the options that are included provide the expected functionality and behave very much like their GNU counterparts. BusyBox provides a fairly complete environment for any small or embedded system.

Also in Titanium Backup if you hit the problems button, it will download and install busybox


GUI for GladRoot4.2

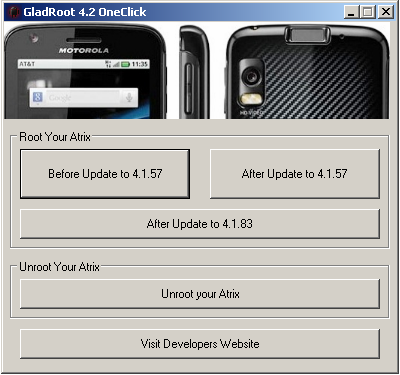
One Click Interface for GladRoot of the Motorola Atrix

While this is no large feat I have created a GUI Interface for GladRoot 4.2.  I have had many people request an easy way to use GladRoot without having to manually run .bat files so I took 10 minutes and created this as a happy medium.  While this GUI only runs the files that are already at your fingertips it will give those lazy users the ability to just click a button to run the correct files You will still have to read the windows within GladRoot.

gladroot gui

DOWNLOAD HERE

If you have already used GladRoot to update to 4.1.57 just open this up and click “After Update 4.1.83” and your done.

I have included the GladRoot 4.2 files and the GUI within a zip file that must be unzipped directly to your Root drive.  (C:/GladRoot4.2). The file to run the GUI will be GladRoot.exe

If anyone has issues please leave comments.

For full instructions on rooting your Motorola Atrix via GladRoot please visit this article.

I would like to thank everyone at XDA for the actual brains behind the GladRoot project.  My only contribution is literally visual 🙂


Root the Droid Incredible with Unrevoked

Unrevoked will flash a custom recovery image to your phone allowing you to perform advanced tasks on your system partition.  Basically it roots your phone to unlock the features that you already have but are blocked.

Just for you Best Buy Guy 🙂
Root Instructions for the Droid Incredible

  1. Download Unrevoked3 (download link)
  2. Download HBoot Drivers (windows only …. download link)
  3. Backup your phones contacts and anything else you don’t want to lose.
  4. Plug your phone in via USB and select charge only when asked.
  5. Run Unrevoked
  6. Enjoy your rooted Droid Incredible


NOTE: Users have reported that this should be done on a windows machine without HTC Sense installed.  HTC Sense interferes with Unrevoked3’s root process.

If you have issues with granting superuser rights to your phone aka running titanium and it telling you your phone does not have root permissions, Download busybox from the market and install it, this will fix the issue.


As always Android Advice is in no way responsible for use of the tools we post as everything on our site is for learning more about your phone.  Using the tools are at your own risk.


Motorola Atrix Bootloader Bypassed?

I personally have a Motorola Atrix 4G (the phone that I use on a regular basis not just for playing with) and its by far my favorite of the current devices.  It has superior, well everything at this point.  There are many other phones coming out this year that will give it a run for its money but Motorola and AT&T have restricted this phones full potential.

From what we have read unlocking the Atrix’s bootloader has been in the works since before the phone was released and many attempts have been unsuccessful until kholk (an XDA Developer, has found a way to bypass it.

Kholk named his unlocking project the Eternity Project. He used “Kexec”, “a mechanism of the Linux kernel that allows booting of a new kernel over the currently running one”, to bypass the Atrix’s bootloader. Kholk claims that he still has to create an actual kernel that is compatible with kexec.

If you have a Motorola Atrix this project will be important to you. Once this is all figured out it will allow users to flash custom ROMs to your phone which will unlock all the features that Motorola and AT&T have restricted thus far. There is still work to do on the Eternity project as Kholk is in need of help from the Android community developers to work on a bootable kernel from kexec.

We will keep up with the Eternity Project and keep this article updated to show any progress so come back and check it our periodically.  If you are interested in helping with this project visit Kholks website at: http://www.droidmatters.com/

How to root the HTC Thunderbolt

This is an easy root method for the HTC Thunderbolt. While I say easy it is a long process but easy just the same. This method has only been tested on the HTC Thunderbolt with firmware versions 1.12.605.9 and below (just keep this in mind before you start).

Rooting instructions for the HTC Thunderbolt

  1. Put your phone in USB Debugging Mode (settings -> applications -> development -> Click USB Debugging)
  2. Turn off WiFi and plug your phone into your computer
  3. Start the root program (download link)
  4. Click step 1 … the program will say starting daemon, find your device and then start pushing files (be patient this can take up to 10 minutes)
  5. Your phone will restart when this is complete (if not close rooter.exe, restart it and click step 1 again)
  6. After your phone restarts it will come up to your boot system screen (Bootloader will be highlighted in blue)
  7. Make sure Bootloader is selected and hit your power button (this will take a minute and go through checking PG05IMG.zip)
  8. Your phone will ask if you want to update, press Volume Up
  9. Your Phone will begin updating (when done it will say Update complete.
  10. Press Power to reboot your phone
  11. Your phone will boot to the main screen (skip the phones setup)
  12. Turn USB Debugging mode back on again and unplug and re-plug your phone back into the computer.
  13. Click step 2 … (if your phone comes up with an error close rooter.exe and restart it and click step 2 again)
  14. The program will start pushing files to your phone (when complete your phone will reboot into the system menu again)
  15. Top of your screen will say MECHA XD ENG S-OFF and bootloader will be highlighted in blue again.
  16. Make sure bootloader is selected and press your power button (it will take a minute checking the PG05IMG.zip file)
  17. It will ask you again if you want to upgrade (press volume up and the phone will start updating)
  18. When complete it will say Update complete … Press Power to reboot your phone. (if it boots into clockwork recovery just reboot again into the main system)
  19. Skip through the setup options again, turn USB Debugging back on and unplug and re-plug your phone back in.
  20. Click step 3 … (your phone will sit for a while be patient its doing things, when done your phone will reboot)
  21. If your phone didn’t reboot when completed close rooter.exe, restart it, and click step 3 again
  22. Enjoy your Rooted Thunderbolt

As always Android Advice takes no responsibility for use of these instructions as they are here for those of you that already have some idea of what your doing and know that this may void your phones warranty.


Credit for the Rooter.zip can be found at: http://forum.xda-developers.com/showthread.php?t=1005292

Root & UnRoot the Motorola Xoom Tablet

This method will Unlock, Root, UnRoot and ReLock the Motorola Xoom MZ600. Rooting your Xoom Tablet may void your warranty and have posted these instructions for you to try at your own risk.


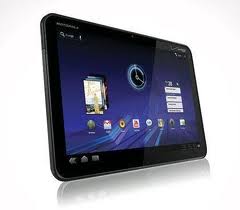
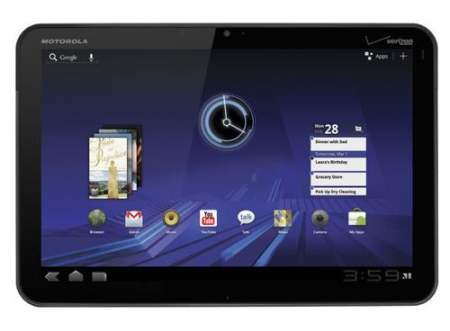
motorola xoom tablet root
Motorola Xoom Tablet


Instructions to root your Motorola Xoom Tablet:

  1. You MUST have your tablet in USB Debugging mode (settings -> applications -> development -> Click USB Debugging).
  2. Download Root My Xoom w Unroot (file is large because it has the stock system.img file in it) Download RootMyXoom w/ Unroot at http://www.mediafire.com/?150q43pkdtrh7m8
  3. Unzip everything in a folder on the root of your PC (example: c:/xoom/root)
  4. Run the Xoom One Click EXE tool and follow the instructions (please read the prompts carefully).
  5. Enjoy your Rooted Motorola Xoom 🙂

As always Android Advice is not responsible for any damage to your device and would like to remind you that rooting your device may void your warranty and we post this only for this that don’t care and want to try it.


Original Article can be found at: http://forum.xda-developers.com/showthread.php?t=1011196


NVIDIA Tegra 3 for Android Devices

NVIDIA Tegra 2 currently provides more than enough horsepower for tablets to perform many functions and processes requiring high processing speed. Tegra 3 closely follows Qualcomm’s ambition to see a 1.5-GHz quad-core design that would be more than twice as fast as Tegra 2. The fast processing power will improve development, customizations, and faster-performing apps.

Tegra 3 also brings many new capabilities and advancements that will make it the next hot topic in the Android market. Major case in point is the notion of Blu-ray driving in tablets is silly, but the chip’s support for it could mean that NVIDIA envisions the Tegra 3 as something that can also be used in ultraportable laptops, all-in-one desktops, or kiosks. Tegra 3 will have triple the graphics power onboard to decode Blu-Ray DVD. Tegra 3 will have a 12-core GPU with a capability to run flawless 3D stereo.

Considering the faster speed, you would expect Tegra 3 to draw a lot of power. It actually draws even lesser power than the Tegra 2. To keep the power draw reasonable, it would have a ultra low power processor mode to cut down the clock speed or number of active cores translating to longer battery life. As with earlier Tegras, NVIDIA would have both the full-power tablet version, the T30 optimized for 1920×1200 display, and a smartphone-optimized AP30 that would be limited to a 1366×768 main display but still have the quad-core option.

Test samples of the Tegra 3 have already started leaving the factory but NVIDIA isn’t expected to ship the new components until this fall. Odd are the Tegra 3 won’t be in stores until early 2012 for most devices.

We are looking forward to the speed and opportunities that the Tegra 3 will have in store for all new Android devices.