AT&T Introducing Service to Block Stolen Phones

AT&T Service to Block Stolen Phones and Tablets Service

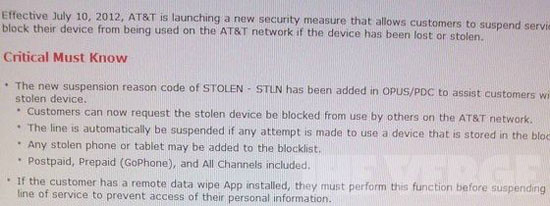
AT&T will be announcing a new service they will be offering to block stolen phones service effective July 10th. This service will be available to give customers the ability to suspend service on their device and prevent it from being used. It looks like the service will only block the phone service from AT&T so the stolen phone could still be unlocked and used on another carrier from what we gather. All a customer must do is call an AT&T service representative and they will add the phone to a block list. At this point the tablet or phone on the list will cut off if someone attempts to use it.

The image above was leaked and comes courtesy of The Verge and even shows a feature to remotely wipe your device in the event your that worried about it in the wrong hands. If an AT&T customer wants to wipe the device they must use that feature before adding it to the block list. The service will be available to both prepaid and contract customers.

Once a customer has had their device blocked by reporting it stolen to AT&T it is permanent unless the same customer that reported it calls to have the block removed. There still has been no official announcement of this new feature we should of course hear more by the Tuesday July 10th date given in the leaked document. When we find out more we will let you know.

Source: The Verge

Android 4.1 Jelly Bean Based ROM CyanogenMod 10 (CM10)

CyanogenMod 10 Android 4.1 Jelly Bean

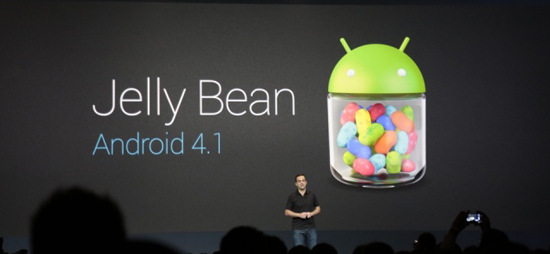
Since Google announced Android 4.1 Jelly Bean this year at Google I/O the CyanogenMod team has started working on the newest iteration of CyanogenMod now known as CM10. CM10 is the popular CyanogenMod teams version of its custom ROM based on Android 4.1 Jelly Bean that can already be seen partially working now. The CyanogenMod team did make an announcement as to why it followed their CM9 ICS ROM with Jelly Bean being CM10:

“Many have asked whether JB will be CM9.1 or CM10. Keeping with the pattern thus far, every newly named AOSP update results in a bump to the CM major version. This has the added benefit of fitting into the pattern of [insert codename position in the english alphabet] = CM version. Examples being: G is the 7th letter thus CM7, I is the 9th letter thus CM9 and J = 10″.

The CyanogenMod team has already stated that the new ROM should support any device that is currently supported by CM9. The only thing that they have to look at and probably hack is the Project Butter improvements for different types of hardware. Below are their thoughts on the subject:

“The ‘Project Butter’ enhancements to Android are much anticipated and should not be a huge pain to merge. We anticipate some breakage in existing libs but nothing that the reference board devices or some hackery won’t overcome. Essentially, if your device met our criteria for CM9 (512mb RAM, etc) and is already supported, then you should be in line for CM10. There may be some added headaches around hwcomposer, but we’ll cross that bridge when we get source”.

It looks to us like anyone with an Android phone that currently runs CM9 should be able to look forward to a CM10 ROM over the coming months. Once there is a public version from some of the more popular devices we will post the instructions as well as where to get the flashable files for CM10.

Source: CyanogenMod Google+ Page

Create your own Mobile App with InstApp

It’s launch day, so we welcome you to celebrate with Attrecto the birthday of their brand new development, they have been working for over 8 months. It is an easy to use, intuitive and useful DIY app creation system called InstApp.

Well, it’s still in beta, so it is actually about to take off, but it is now definitely open to anybody, who wants to make a mobile app for his/her event. And the best news is, that it is can be completely FREE. If you are planning a conference, a festival, a club party, an exhibition, or just a birthday party, a wedding, a fraternity party, or any other event, you can make both the Android and the iOS App of the Event only using our website. Below you can read the Press Release, or you can go straight to make an app for yourself.

DIY Mobile App creating System is now available to
make Android and iPhone apps in minutes

PRESS RELEASE – Győr, Hungary (3. July 2012) – Attrecto, the innovation leader in smartmobile development, today announced the release of its InstApp mobile development system. The free system features a DIY interface to create Android and iOS applications without coding, specialized for event organizers.

“People at events need real-time information on the program schedules and performers, meanwhile event organizers need real time feedback from the visitors and need to reach them before, during and after the event” – said Gergely Kiss, CEO of Attrecto. “With Instapp we provide event organizers an easy to use DIY tool, to present their events’ real time information at the fingertips of the visitors.”

On their preferred mobile device – Android or iPhone – Event participants will access well-structured information in a graphically custom designed application, created uniquely for the Event.

InstApp includes Calendar synchronization as well as a Navigation tool, where the participants are directed easily to the location. Presenters’ bios and topics and the full Event Schedule are literally at their fingertips.

Venue layout maps keep your participants on time for each presentation, no more lost time spent on asking directions.
InstApp includes full social media integration for participants to share their favorite parts of the program.

A demo app is available in Google Play:
https://play.google.com/store/apps/details?id=com.attrecto.eventgeneraldemo

About Attrecto:
InstApp is developed by Attrecto Smartphone Solutions – an innovative team of smartphone app developers working creatively and professionally to develop practical and well-designed apps for all industries.

Source: HelloAndroid

Android 4.1 Jelly Bean Review

What is Android 4.1 Jelly Bean

Android 4.1 Jelly Bean was officially announced this year at Google I/O and is easily the greatest enhancement to the Android OS. Android 4.1 from the outside looking in seems to just be an incremental update to the Android 4.0 OS with some enhancements although it is much more than that behind the scenes. This update easily places Android as the top mobile OS to date with its upgrade to Jelly Bean.

While no devices will be released or upgraded until the middle of this month which is only a week or two out it will almost immediately be pushed out to a few devices. The Samsung Galaxy Nexus, Nexus S and Motorola Xoom will get the update this month. Also a version of the Jelly Bean OS has already been released to developers when the OS was announced.

Some of the features that have been added make Android 4.1 Jelly Bean an OS to be reckoned with in the smartphone world. Below we will explain each feature and its benefits to Android users.

Butter UI is the Enhancement we all Want (Incredible Speed Increase):
One of the only reasons that iOS users prefer Apple is the performance it has over the Android OS, this is no longer the case. Android has had to keep up to date with hardware technologies to keep up with iOS till now while Apple seems to use sub par hardware and still give users a smoother experience. Jelly Bean with Google’s new Butter UI removes Androids lag and sticky nature almost completely. Butter UI allows Android 4.1 to ramp up CPU access when using the touchscreen allowing Jelly Bean to react instantly when you touch the screen. Literally there is no delay when switching between processes.

Improved Notification Bar (More Information Quickly):
Android’s notification bar is already the best in the industry which has been proven by Apple’s attempts at copying it recently. In Android 4.1 Jelly Bean they have improved their notification bar even more even though we thought it wasn’t possible. When you get an email notification in Android Jelly Bean will now allow you to expand its contents by dragging two fingers down to pull them apart. This allows you to see your inbox without actually opening it up from the app. Another feature that everyone wants no matter who you are is the fact that you can now stop third party applications from sending you messages. This can be disabled on an app by app basis.

Jelly Bean has a Siri Rival “Google Now” (Assistant you don’t have to ask):
We have all been made aware that Google has been working on a Siri competitor for some time now but its not the personal assistant that we all assumed it would be. Google has improved the Google Search feature to make it more like Siri although Google Now is more of a context sensitive information system. This new system in Jelly Bean will show the user relevant information based on your current location, time of day and searches you have made from your phone and computer. This system actually learns your habits, movements, and interests to give you useful information. And example is Google Now will memorize the route you take to work and if there is traffic tell you bout the delays and an alternate route automatically.

Here at Android Advice we are excited about Google’s outlook on the new OS and their unstoppable need to keep updating with new innovative features. Jelly Bean is just the beginning of a great new direction for the Android OS.

Archos Tablet Battery Not Charging (FIX)

Archos G9 Android 4.0.3 Ice Cream Sandwich bug Fix

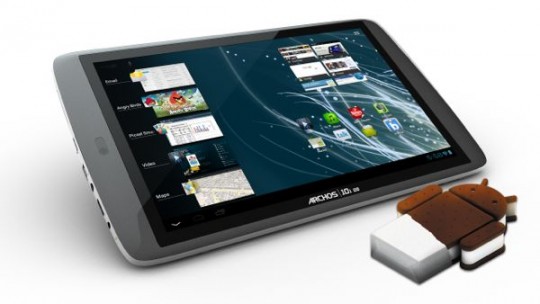
Archos has been a big name in the Android Tablet game due to its low cost tablets but these tablets don’t come without issues. One of the worst issues plagueing the Archos tablets are the fact that when you let them die completely they don’t want to charge at all. This being said there are some things that you can do to get your battery in your Archos tablet to start charging again.

The methods here dont always work right away so you will have to play with the tablet and try a few different things before you will even get it above 15% charge. Once you are over 15% charge you are usually in the clear and the tablet will charge just fine.

NOTE: Once you fiw the battery not charging issue with your Archos be sure that you try not to ever let it get below 15% or you will be in the same boat your in right now all over again.

Fix the Archos Tablet Battery Not Charging:

  1. Unplug anything that you have connected to your Archos Tablet (this means sdcard, USB cable, and the charger itself).
  2. Press and hold the power button for 10-20 seconds to be sure that the device shuts off completely if its not already unresponsive.
  3. Plug your charger into the Archos tablet then into the wall, be sure your only using the cable that came with your Archos tablet.
  4. Ignore the lights or lack thereof because when the tablet is that dead it will not blink the proper codes all the time.
  5. Wait about 20 minutes and check the tablet by tapping the power button one time quickly
  6. If the tablet is on or turns on at this point leave the Archos tablet alone and let it charge for around 4-5 hours. (up to 12 hours if the battery is completely dead)

If after leaving your Archos tablet plugged in for 4-5 hours its still showing that its not charging then there are a few more things you will need to do.

  1. tap the power button to wake it up and turn off WiFi (and 3g stick if you have one)
  2. tap on the system manager and close all open applications
  3. tap the power button again to put it back to sleep

At this point your Archos tablet should start to show a charge within a few hours and may take an additional 12 hours to fully charge after the completely drained battery. Keep in mind that you need to be sure you leave the Archos on to charge. If you turn the device off with it plugged in it will not charge since the battery relies on charging processor curcuitry to continue charging (the reason it was made this way is unknown). If you are still having issues you can drop us a line here via comments although your problem may be a hardware issue besides the one Archos gave it out of the box.

How to Root the Google Nexus 7 Tablet

How to Root the Google Nexus 7

The first thing that most Android users ask is how do I root my nice new device, well root access is already available on the Google Nexus 7. There are a few steps that need to be completed to gain root access on the Nexus 7 although nothing is too difficult. Below are the detailed instructions and resources you will need to gain root access on your Nexus 7.

How to Root the Google Nexus 7 Tablet:

  1. First Unlock the Bootloader (Instructions Here)
  2. Second install CWM Recovery (Instructions Here)
  3. Download JB-SuperSU.zip (Download Link)
  4. Place the JB-SuperSU.zip file on the Nexus 7 SDcard
  5. Power off your Nexus 7
  6. Hold power + vole up + vole down to get into recovery
  7. You should see the CWM logo and a menu
  8. From the Main Menu select “install zip from sdcard”
  9. Then select “choose zip from sdcard” and select the JB-SuperSU file
  10. Confirm and let it finish
  11. When back to the menu select “reboot system now”
  12. Congrats your Nexus 7 is Rooted on Android 4.1 Jelly Bean!

Of course we aren’t responsible for the use of these instructions or any damage that may be caused by following them. This being said if you have any issues we are glad to help and you may ask in the form of a comment below. Also anything that you feel will help others or needs to be added to the instructions please share that as well.

Download the Jelly Bean Factory Image for Google’s Nexus 7

Google Nexus 7 Factory Image Download

Soon after Google announced the Nexus 7 tablet they made the factory image available for download. Google released the Android 4.1 factory image for the Nexus 7 on their developers website. The size of the image is surprisingly small coming in at 246MB and even if you don’t need it right now it may be a good idea to grab it in case you find yourself in a bind and need it.

This is a flashable image of Android 4.1 Jelly Bean which will allow you to flash your Google Nexus 7 back to the stock ROM in the event you brick it doing what we all like to do to our Android devices. Find the image download below:

Download the Android 4.1 Jelly Bean (Nexus 7) Factory Image

If you have downloaded and used the factory image let us know how it went and if you ran into any issues.  We haven’t attempted to flash our Nexus 7 at all at this point but when we do we will post the results here no doubt.  We would actually like to hear why you needed the factory image to be honest.  Not for any real benefit besides the entertainment of hearing the stories of the great ways others FUBAR their devices.  We aren’t judging by any means we brick a device every other week so it happens to us all.

UPDATE: Ok so we did have someone bring us a bricked Nexus 7 and we were easily able to flash the factory image back to the device without any issues.  Everything since the flash seems to be functioning as if the tablet was brand new and never messed up.  If we happen to run into any issues that we haven’t seen to this point we will come back and report.

Install ClockworkMod Recovery on the Google Nexus 7

Installing ClockworkMod Recovery on the Google Nexus 7 is actually a simple process that can be found below. If you have a Nexus 7 (or will be getting one) you will notice that there really isn’t a long drawn out process to mod anything on it being a pure Android experience.

How to Flash ClockworkMod Recovery on the Nexus 7:

  1. First you will need to Unlock your Bootloader (Instructions Here)
  2. Download CWM-grouper-recovery.img to your fastboot folder (Download Link)
  3. Open Terminal on Mac or Command prompt on PC
  4. Navigate to your fastboot folder within the Android SDK
  5. Type “fastboot flash recovery CWM-grouper-recovery.img”, press enter
  6. Type “fastboot reboot”, press enter
  7. Wait for your Nexus 7 to boot back up
  8. Now type “mount system”, press enter
  9. Type “adb shell”, press enter
  10. type “cd /system”, press enter
  11. type “mv recovery-from-boot.p recovery-from-boot.bak”, press enter
  12. Congrats you now have ClockworkMod Recovery on your Nexus 7!

As always follow the instructions at your own risk we cant be held liable for their use. With this we welcome any questions or issues that you run into or anything you think should be added to help others understand the instructions better via comments below.

How to Unlock the Google Nexus 7 Bootloader

Unlock Google Nexus 7 Bootloader

The Google Nexus 7 Android tablet has been up for pre-order now for a few days and already there is a factory image and instructions to unlock the bootloader. In order to unlock the bootloader you will need a basic knowledge of adb and the Android SDK downloaded on your computer.

NOTE: Unlocking the bootloader on the Google Nexus 7 will wipe all data from the device so if you have already installed apps or anything else be sure to back it up.

How to Unlock the Nexus 7 Bootloader:

  1. Install Google Android SDK (Download Site)
  2. Enable USB Debugging on the Nexus 7 “Settings -> Developer Options”
  3. Connect your Nexus 7 to your Mac or PC
  4. Launch either Terminal on Mac or Command Prompt on PC
  5. Navigate to the fastboot folder within the Android SDK
  6. Type “fastboot oem unlock”, press enter
  7. Type “fastboot reboot”, press enter
  8. Congrats your Bootloader is unlocked!

The next step is usually installing a custom recovery like ClockworkMod which we will link to here shortly after the posting of this article. Keep in mind that unlocking the Nexus 7 bootloader may void your warranty and as always we aren’t responsible for the use of these instructions, be sure you know what you are doing before beginning. If you have any issues with the steps above please feel free to post in the comments below.

Google’s Sound Search (Google Ears) APK (No Root Required)

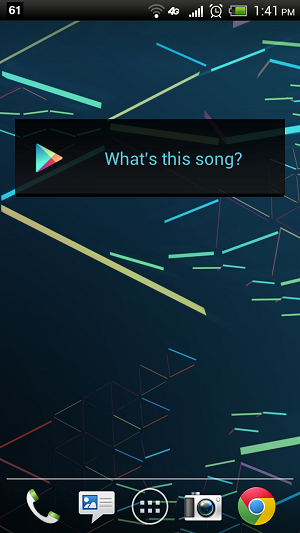
Google Ears APK DownloadIt looks like Shazam and SoundHound have some competition from Google with the release of Android 4.1 Jelly Bean called Google Ears. Google Ears is Google’s Sound Search feature that has been added to their Jelly Bean OS. Quite simply the Google Ears app scans a song and after identified it will go to the Google Play market and give you the option to purchase the song. Of course you can use it to just identify a song and get it however you do.

Originally there was a port of Google Ears that was released but it required rooted devices now you can install it on a stock unrooted Android device easily using the apk below.

Download Google Ears APK for Un-Rooted Android Devices

Download Google Ears APK for Un-Rooted Android Devices