Latest Google Play v3.7.11 Jelly Bean Store (Download)

Android Jelly Bean Play Store APK Download

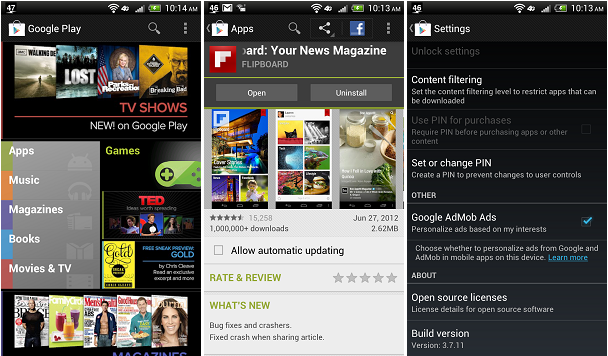
Google announced many new features and tons of new content for the Google Play Android market including magazines, ability to purchase movies, and TV shows. Another cool feature is the social addition of being able to choose a sharing method that you can link to the Google Play store by long pressing. This being said the new features and content requires the Jelly Bean version of Google Play which is currently only available on the Google Nexus 7 tablet and a few Galaxy Nexus devices after Jelly Bean update.

Of course over at XDA they have ripped out the Jelly Bean Play store from the Galaxy Nexus and made it available to the general public. All you need to do is literally download the Google Play apk below and install it on your Android device to use all of the new features and content.

Download the Jelly Bean Google Play Market APK

Nokia Claims Google’s Nexus 7 Infringes their WiFi Patents

Nokia Suit against Google Nexus 7

The newest patent infringement claim now comes from Nokia who claims that the Google Nexus 7 has infringed on their WiFi patents. This news comes to us from The Inquirer who state that the Nexus 7 is using WiFi patents owned by Nokia but aren’t licensed. Nokia is now coming out and wants some royalties for the Nexus tablet and the Jellybean OS. Nokia also stated that ASUS and Google used their patents without even mentioning they were doing so and instead just did what they wanted with them. Nokia hasn’t officially started a lawsuit, which we assume is because Google would bury them. They will most likely just try to get small royalties from the sales of the Nexus 7 as Microsoft does with HTC and other smaller OEM’s.

Personally we think these patent claims are a waste of effort and money for OEM’s being a serious downfall of innovation. We can only assume that Google will either ignore it and bury Nokia in legal paperwork or just pay a small royalty if they see fit. Let us know what you think via comments below.

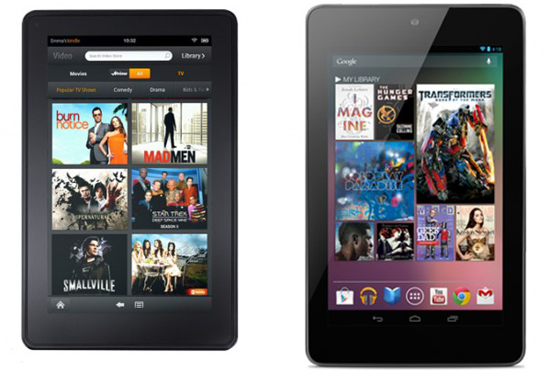
Google Nexus 7 v.s. Amazon Kindle Fire (Compare)

Google Nexus 7 compared to the Amazon Kindle Fire

The big question is should I get the Google Nexus 7 or the Amazon Kindle Fire? Both are low cost 7 inch tablet and both are big names in the industry geared towards content like reading books, magazines, watching movies and listening to music. Amazon easily has a head start being the first of its kind to the market and having a years worth of publicity and sales under its belt. Both having price point of around $199 which one should you choose?

Google Nexus 7 vs Kindle Fire Price Point:
The Amazon Kindle Fire comes in one version with a price of $199 for an 8GB model which is exactly the same as the Google Nexus 7’s 8GB model at $199. This being said Google also has a 16GB model of the Nexus 7 for an additional $50. Even with Google having the upgraded model this seems to be a tie since the average user will be looking at the 8GB model if comparing the 2 on price.

Google Nexus 7 vs Kindle Fire Form Factor:
The Google Nexus 7 and the Kindle Fire seem to be pretty close when it comes to this as well both being 7-inch tablets and both being designed for portrait orientation. Both tablets have the same width at 120m with the Google Nexus 7 being about 8.5mm taller. The one thing that stands out with the Nexus 7 is that it is thinner by about 1mm with a curved back instead of the boxy feel of the Kindle Fire. Both devices have a soft back making it much more comfortable in your hands than most Android tablets. The Google Nexus 7 does have actual volume buttons instead of the on screen controls that the Kindle Fire has which is a nice feature that for unknown reasons was ignored on the Fire. As far as the screen goes the Nexus 7 has a higher resolution coming in at 1280×800 making it a much clearer display than the Kindle Fire. The Nexus 7 easily wins when it comes to its form factor and feel in your hands along with general use functionality.

Google Nexus vs Kindle Fire Hardware:
This Kindle Fire has a dual-core TI OMAP 4430 processor that runs at 1GHz and 512MB of RAM. The Nexus 7 however has a quad-core Tegra 3 processor which smokes the Kindle as far as speed goes with speed thats currently about as fast as it can be. The hardware on the Nexus 7 kills the Kindle Fire being that of a powerful gaming device as opposed to a reader with a little extra speed.

Google Nexus 7 vs Kindle Fire Content:
The content is where Google was really trying to stand out allowing users to not only have the Amazon market if they want it but the full Android market which was excluded from the Kindle Fire. This being said the Kindle Fire does have all of the Kindle services optimized and included without he tablet making it competitive. With this it was a close decision but we vote Google Nexus 7 simply because having Google Play is something that should be a part of any Android tablet by nature.

Google Nexus 7 vs Kindle Fire Software (OS)
Currently the Google Nexus 7 will be shipped with the newest Android OS Android 4.1 Jelly Bean which is not only the latest and greatest but is optimized for speed. The Kindle Fire is still running Android 2.3 Gingerbread, while heavily customized this is more than one Android OS behind the Nexus 7. With this we all know that Google will support and update their new child without the best they have to offer as it comes available so here we easily choose the Nexus 7

In conclusion if your choosing between the 2 we think that while the Kindle Fire is a great device that Google has came up with a worthy competition that wins in almost all aspects. If you strictly need a reader and aren’t interested in the added features and speed then the Kindle Fire is still a great tablet. Please let us know what you think and debate anything that you think we were unfair about in our comparison via comments below.

Install Android 4.1 Jelly Bean on the HTC One X

Jelly Bean on the HTC One X

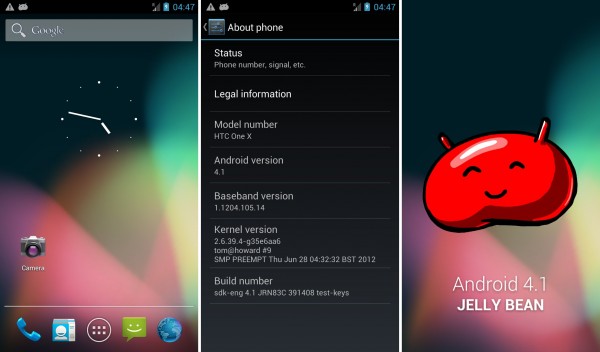
If you have to have the latest and greatest Android OS and own an HTC One X you can install Android 4.1 Jelly Bean on your HTC One X. There are some great features that have been added with Android 4.1 on the One X like the improved notification bar, offline voice recognition, updated Google search and performance improvements due to Google’s new “Project Butter”. Its all around a smoother Android experience.

The Android 4.1 Jelly Bean port comes from the new Android SDK (software development kit) and was ported by XDA member tgascoigne for the HTC One X. Keep in mind that the Android SDK version of Jelly Bean is very unstable and should not be installed on your every day phone. There are a few features that are not working in the port to the One X which are as follows: Wifi, audio, and camera.

NOTE: Backup all of your apps as the process will completely wipe your phones data out.

How to Install Android 4.1 Jelly Bean on the HTC One X:

  1. Unlock the HTC One X Bootloader (Instructions Here)
  2. Install ClockworkMod Recovery (Instructions here)
  3. Install HTC Sync drivers on your Computer (Download Link)
  4. Download the Android 4.1 Jelly Bean ROM (Download Link)
  5. Copy the zipped ROM to your One X SD Card
  6. Download and extract Flash_Boot.zip to your Computer (Download Link)
  7. Open the file downloaded in step 4 and copy “boot.img” to your Flash_Boot folder
  8. Power off your HTC One X
  9. Hold Power + Volume Down to get into Bootloader
  10. Use volume buttons to select “fastboot” and power to select it
  11. Connect your One X to your computer via USB
  12. Go to your Flash_Boot folder and run “flash-boot-youros” to flash Kernel
  13. After complete select bootloader via the phones power button
  14. Navigate to recovery and select it to boot into ClockworkMod Recovery
  15. Select “data/factory reset”, then select yes to confirm
  16. Select “mounts and storage”, then select “format system” and confirm
  17. After complete go back to the main recovery menu
  18. Select “install zip from sdcard”, then select “choose zip from sdcard”
  19. Select the jelybean_endeavoru_tgascoigne.zip file, and select yes to confirm
  20. Wait for the process to complete and select “reboot system now”
  21. Congrats your HTC One X will boot into Android 4.1 Jelly Bean!

While this isn’t a fully functional stable ROM since its coming from an SDK port it is fun to play around with. It will still work as a phone with some cool features and give you the ability to show off Google’s newest Android OS early. Let us know what you think in the comments below.

How to Install ClockworkMod Recovery on the HTC One X

HTC One X ClockworkMod Recovery

ClockworkMod on the HTC One X has been in the works for a while but is now available for the popular device. While you can get ClockworkMod Recovery on the HTC One X its not fully functional and what this means is that some of the processes need to be completed through the recovery and not the ROM manager itself. A few of the things that are still being worked on is USB mounting within recovery, charging while in recovery mode and flashing ROM’s within the ROM Manager. This being said everything worksas far as getting it setup to be abel to install custom ROM’s you will just need to follow the instructions below.

How to Install ClockworkMod Recovery on the HTC One X:

  1. First you will need to unlock the HTC One X Bootloader (Instructions here)
  2. Make sure you have the Android SDK installed (Installation Instructions)
  3. Download and extract fastboot to your PC (Download Link)
  4. Download the ClockworkMod Recovery Image to your fastboot directory (Download Link)
  5. Power off your HTC One X
  6. Hold Power + Volume down to boot into bootloader
  7. Use your volume buttons to select “fastboot” and power to select it
  8. Connect you HTC One X to your computer via USB
  9. Open a command prompt and type “fastboot devices”, press enter
  10. You should now see a device listed, this means everything is fine and you can continue
  11. Now type “cd c:/fastboot” (or wherever your fastboot folder is), press enter
  12. Type “fastboot flash recovery recovery-clockwork-touch-5.8.2.4-endeavouru.img”
  13. Wait for the process to complete then type “fastboot reboot” to reboot your One X
  14. Congrats you now have ClockworkMod Recovery installed on your HTC One X!

Now that you have ClockworkMod recovery installed on your HTC One X you can install custom ROM’s and really do whatever you want with your HTC One X. If you have any issues or think that something needs to be shared to make this easier for others please leave it in the comments below.

How to Unlock the HTC One X Bootloader

Unlock HTC One X Bootloader

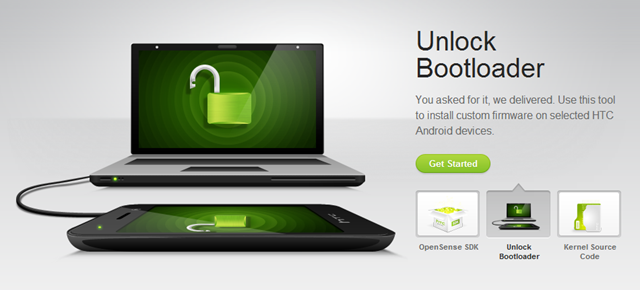
Since HTC started htcdev.com we have been pleased to see ROMs availability increase for popular devices almost immediately since the average user can unlock their bootloader. This being said there is still a process that you must follow in detail to make sure the process is successful.

NOTE: Be sure that you have at least 50% battery before beginning the process. Also take note that all of your HTC One X data will be wiped so backup anything you need to keep. SDcard data will be untouched.

How to Unlock the HTC One X Bootloader:

  1. Install HTC Sync Software for proper drivers (Download Page)
  2. Download and extract fastboot files to your PC (Download Link)
  3. Open your web browser and go to http://www.htcdev.com and create an account (Register here)
  4. After you have created your account and verified your email go to the “unlock bootloader page” (Bootloader Unlock Page)
  5. Select “All other supported models”, then click “Begin Unlock Bootloader” page
  6. You should now see a popup, read it if you’d like then click “Yes”
  7. Next comes the legal terms, select the checkboxes and click “Proceed to Unlock Instructions”
  8. Next you will see some instructions which basically are telling you to turn off your phone, hold power + volume down until in bootloader mode, select fastboot via power button, and then connect your HTC One X to your PC via USB
  9. Go to the second page and click “Proceed to set 5”
  10. Go to the folder you created in step 2 and press shift and right click in a white area
  11. Select “Open command window here”, a command prompt and window should come up
  12. Type “fastboot devices” this will let you know that your One X is connected okay with proper drivers.
  13. Now go to the third page by clicking “Proceed to step 8”
  14. Follow all instructions on htcdev at this point and click “submit” when done
  15. You should now see “Token Submitted Successfully” on the next page and will receive an email with an unlock key attached.
  16. Download the “Unlock_code.bin” file within your email to your fastboot folder created in step 2
  17. Now open the link in the email from HTC to continue with instructions
  18. Go back to your command prompt and type “fastboot flash unlocktoken Unlock_code.bin”
  19. You should now see the Unlock Bootloader request on your phone
  20. Use Volume up to select yes and press power to select it
  21. Your phone will now reboot and do a factory reset, be patient
  22. Congrats your HTC One X Bootloader is now unlocked!

Let us know if you have any issues and anything else that you think may help others via comments below. Also keep in mind that this is meant for development purposes although may be required to install any custom ROM’s on your device. Also as always we are in no way responsible for the use of these instructions so be sure you know what you are doing before you begin.

Pre-Order the Google Nexus 7 Android Tablet Now

Google Nexus 7 Tablet Available for Pre-order

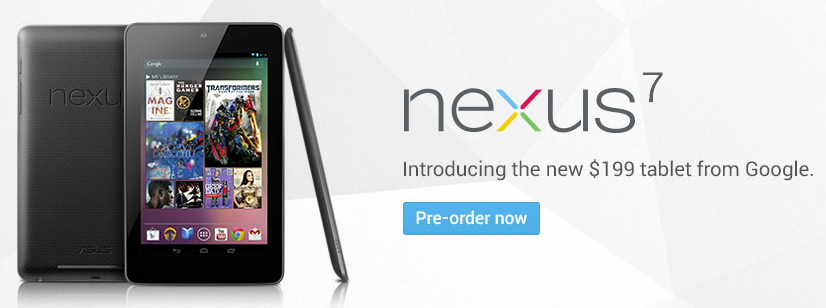
Yesterday Google posted their Nexus 7 tablet on the Google Play store. Priced at $199 for the 8GB model and $249 for the 16GB model its a steal. The Google Nexus 7 is Google’s 7 inch response to the Amazon Kindle Fire with a completely pure Android experience. To make it even better its the first device to come out of the box with Android 4.1 Jellybean installed.

Pre-order the Google Nexus 7 tablet from the Google Play Store here

MADE FOR GOOGLE PLAY
Nexus 7 was built for Google Play. With Google Play, all the entertainment you love is right in your hand: more than 600,000 apps and games, millions of eBooks and songs, thousands of movies, and a growing selection of TV shows and magazines. Sign in to your Google Play account and we’ll give you $25 of credit to spend in the Play store, as well as some great free content.

THIN, LIGHT AND PORTABLE
Nexus 7 is a no compromise Android tablet that’s designed to go where you go. With a stunning 7” display, powerful quad-core processor and up to 8 hours of battery life during active use, Nexus 7 was built to bring you the best of Google in a slim, portable package that fits perfectly in your hand.

Pre-order the Google Nexus 7 tablet from the Google Play Store here

FIX: AT&T HTC One X Won’t Update (“HTCDM has Stopped”)

HTC One X will not update

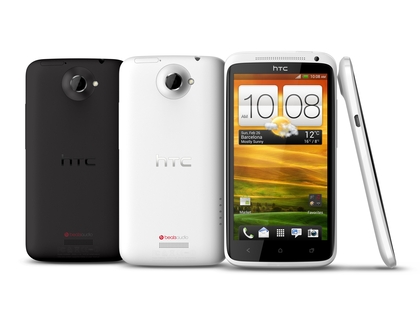
If you are having an issue with the HTC One X not updating through the AT&T Software update feature on your phone don’t freak out it can be taken care of by following a few easy steps. What you will need to do will depend on how far in the update process you actually make it on the device if anywhere at all.

Make sure you are connected to WiFi before trying anything below. The HTC One X seems to have an issue getting updates if your not connected to Wifi before searching for the update.
How to Update the HTC One X When not Updating:

  1. First thing you need to do is go to your downloads folder and make sure that if there is an update file there that you delete it.
  2. Second of course we have to mention to try rebooting the device first and seeing if it works after the reboot.
  3. If Rebooting does not correct the issue then you will need to set the date a few days ahead (Settings -> Date & Time ->uncheck Automatic date & time -> set date a few days ahead), reboot the phone and try to update again.
  4. This time the devices should update fine. After the update completes don’t forget to set the date back to the correct settings.

NOTE: If your HTC One X freezes at the end of the update process be sure that you don’t have it connected to a USB cable or charger as this seems to interfere with the process.

FIX: “Connection Failed Due To APN Settings” Error

Odds are if you are getting the error “connection failed due to apn settings” when trying to turn on mobile data then you have changed from a 3G or HSPA+ Android phone to one that is true 4G LTE. When you make this transition it is required to contact AT&T and have them update your data plan to support their LTE network. The update that AT&T will perform should take no more than a few minutes and will cost you nothing.

While we explain for AT&T customers this issue can be resolved in the same way with other carriers like Sprint, Verizon and T-Mobile.

How to fix the “connection failed due to apn settings” error:

  1. Call AT&T Customer support on Online Chat
  2. AT&T will require your phone number and last 4 of your SS#
  3. Have your IMEI and SIM numbers available (Settings -> About Phone)
  4. Ask them to update your data plan to the LTE network
  5. Thats it they will get it working within a few minutes.

Chat log from our support case regarding the error:

Reggie: I’ll be more than happy to assist you, one moment please.
Reggie: Could you provide me with the last 4 digits of the account holders social security number please?
Brandon Orndorff: ****
Reggie: Thank you.
Reggie: Could I get the IMEI number for the device and the sim card number please?
Brandon Orndorff: IMEI is ************ and the SIM number is *********?
Reggie: Are you able to make calls with the device?
Brandon Orndorff: yes I have been making and receiving calls
Reggie: the issue is the system still has an old data plan active on your account. Your device requires the LTE data plan.
Reggie: It is the new LTE service most likely. I will need to update them.
Reggie: Go ahead and power the device down please. It will take me 2-3 minutes to update your account.
Brandon Orndorff: OK the device is off
Reggie: Thank you.
Reggie: I appreciate your patience. I am almost done.
Reggie: Go ahead and power the device up please.
Reggie: Once the device comes back up try browsing to att.com/ttr please.
Brandon Orndorff: works great thank you
Reggie: Have I completely resolved your issue today?
Brandon Orndorff: It seems you have … Thank you

Why is it so Hard to Develop Android Apps?

Android Fragmentation makes Android Development Harder than iOS

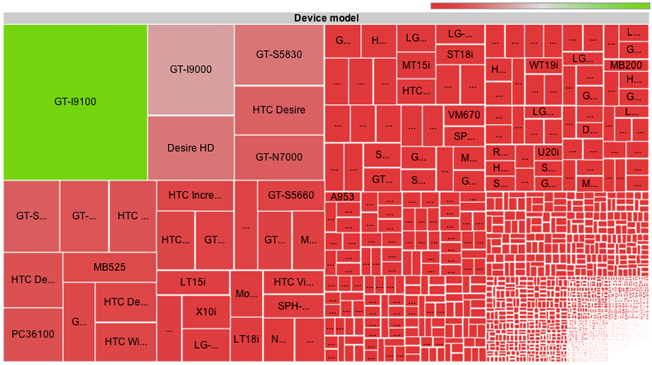
Google being the largest threat to Apple with their Android OS has proven to be a heavyweight in the mobile arena. With this the Apple App Store and Google Play Market have hundreds of thousands of apps. Android however requires much more thought when it comes to app design since its popularity has created a demand for many different screen resolutions, custom UI’s, and hardware configurations. Android fragmentation is due to the number of manufacturers out there using Android for their mobile OS with many different devices.

While all developers have the intension of creating ideal experiences for every user having 4,000+ different models to test on is not at all ideal. You would need to develop different versions of your Android app many times to allow it to function on every device the way you intend it to. This being said the most popular devices can be tested and verified working but its unlikely you will ever be able to develop and Android app to work on every device.

iOS developers have it easy with only a couple different resolutions to deal with although most Android devices can be developed for by making sure it works for the 5 major screen resolutions so don’t let this hold you back. With every manufacturer wanting to design the new thing with the highest resolution and newest hardware its likely that Android fragmentation will get increasingly worse. This being said fragmentation is the future and will likely fall hand in hand with innovation.