Flash the Motorola Atrix 4G Running CyanogenMod 7 Back to Stock

Many of us have flashed our Motorola Atrix 4G to a custom ROM but what happens when Ice Cream Sandwich is available and we want it? Well the process to get your device back to the stock ROM is very easy if you created a backup with ClockworkMod Recovery. If you didn’t create a backup of your ROM before flashing CM7 or whatever ROM you are running then you need to move over to this article. Otherwise your in for an easy process.

Flash your Atrix back from CM7 to stock ROM:

  1. Open ROM Manager on your Atrix
  2. Select “Reboot into Recovery”
  3. Wait for the Atrix to reboot to the Recovery Menu
  4. select “backup and restore”
  5. select “restore”
  6. select the backup file
  7. select the option that says Yes
  8. Be patient as this part will take about 5-7 minutes
  9. Once everything finishes you will be back at the recovery menu
  10. Select “Wipe data/factory reset”
  11. Select yes
  12. When complete select “Reboot System”
  13. Be patient again it will take a while to load up
  14. Congrats thats it your back to stock

This will leave your bootloader unlocked and root access will still remain in tact. Please let us know if you run into any issues (please watch the video above before asking questions). As always we aren’t responsible for usage of this information.

Flash the Motorola Atrix 4G back to Stock 4.5.91 ROM

Those of you that want to get back to the stock Atrix 4G 4.5.91 ROM for one reason or another here it is. Many of you are going to be involved in the upcoming soak testing and some just need it back to stock to get a replacement and are worried about warranty. Keep in mind that this image is for the AT&T Atrix 4G. Either way here are the instructions.

While we haven’t verified this, the ROM you flash here may or may not be able to receive OTA updates. Also you may not be able to flash to an older firmware after doing this without an unlocked bootloader.

Instructions to Flash Motorola Atrix 4G back to Stock 4.5.91:

  1. Download the System image (Download Link)
  2. Download moto-fastboot and install (Download Link)
  3. Turn off your Atrix 4G
  4. Boot the Atrix into “Fastboot Mode” (hold power + vol down)
  5. plug your Atrix into your PC via USB
  6. Navigate to your fastboot folder via command prompt
  7. type “moto-fastboot flash boot boot.img” press enter
  8. type “moto-fastboot flash system system.img” press enter
  9. type “moto-fastboot -w” press enter
  10. type “moto-fastboot reboot” press enter
  11. Grats you now have the stock ROM when the Atrix turns back on

As always we aren’t responsible for your use of these instructions and its recommended that you have a working knowledge of the process before starting. This being said let us know if you have any questions and share your reasons and results with us.

CyanogenMod 9 Available On The Motorola Atrix

Those of us that have the Motorola Atrix have been waiting for some time now to get Android 4.0 Ice Cream Sandwich on the device and it seems for some of us the wait is over. While the CM9 ROM still has some bugs it is available and functions on the Motorola Atrix 4G. If your Atrix is your primary phone you may want to hold out due to some bugs that still aren’t ironed out completely but in any case its a nice ROM.Amazon Atrix 4G

CyanogenMod Features not working on the Atrix 4G:

  • Camera
  • Adobe flash is buggy
  • HDMI landscape
  • YouTube
  • Car dock
  • Some 2d issues
  • Built in video playback

While there are some pretty hefty daily use items not quite there yet like the camera jokersax11 from XDA Developers has vowed that he will not stop until its fully functionally on the popular device. If you have already installed the ICS ROM on your Atrix 4G please let us know what you think. In the mean time we are gonna give it a shot with one of our test devices and get back to you later.

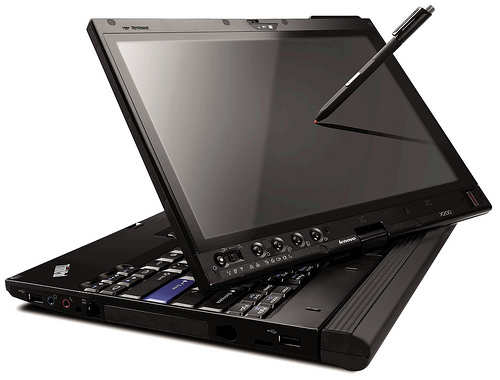
Install ClockworkMod Recovery on the Lenovo ThinkPad Tablet

Lenovo ThinkPad Tablet

If you have a Lenovo ThinkPad tablet you have been waiting for some time to get root access which is finally available here. Along with that Justin Case and utkanos have been able to get ClockworkMod Recovery to work as well without any bugs we can see. Please take note that to get ClockworkMod Recovery on working on the ThinkPad you will need an external SD card.

Instructions to Flash ClockworkMod Recovery to the Lenovo ThinkPad:
Requires Root Access (Instructions to Root the ThinkPad)
Place ClockworkMod Recovery .img on SD card (Download Link)
Go to your ADB folder via Command Prompt
Type “adb push cwr_ventana_2.img /data/local/” press Enter
Type “adb shell” press Enter
Type “su” press Enter
Type “mount -o rw,remount /system” press Enter
Type “echo “#!/system/bin/sh” > /system/etc/install-recovery.sh” press Enter
Type “dd if=/data/local/cwr_ventana_2.img of=/dev/block/mmcblk0p1” press Enter
You now have ClockWorkMod Recovery on your Lenovo ThinkPad!

If you have any issues please feel free to drop us a line as well as giving any input you have on the process.

How to Root the Lenovo ThinkPad Tablet

Lenovo ThinkPad Tablet

If you have a Lenovo ThinkPad tablet you have been waiting for some time to get root access on the device and now its here thanks to Dan Rosengerg. Along with that Justin Case and utkanos have been able to get ClockworkMod Recovery to work as well without any bugs we can see. Please take note that to get ClockworkMod Recovery on working on the ThinkPad you will need an external SD card.

Instructions to Root the Lenovo ThinkPad:

  1. Make sure you have the updated drivers installed on your PC
  2. Put the tablet in USB Debugging Mode “Settings -> Applications -> Development”
  3. Download the Root Exploit (Download Link)
  4. Connect your ThinkPad to your PC via USB
  5. Make sure the screen is unlocked
  6. Extract the Root Exploit downloaded in step 3
  7. Run “run.bat” and follow on screen instructions
  8. Congrats your ThinkPad is Rooted!

Instructions to install ClockworkMod Recovery on the Lenovo ThinkPad Tablet

If you have any issues please feel free to drop us a line as well as giving any input you have on the process.

Android 4.0 Ice Cream Sandwich Windows Desktop

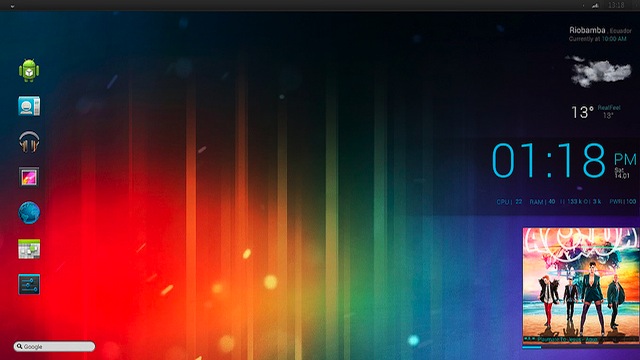
Ever wanted to have your Windows desktop look like an Android 4.0 Ice Cream Sandwich home screen? Now you can thank Flickr user David Molina who has tweaked and skinned with the right tools to make it happen. The outcome of the steps below definitely makes your desktop almost an exact duplicate of your Android 4.0 device.

Android 4 on Windows 7
Instructions to make your Windows Desktop look and function like Android 4.0 Ice Cream Sandwich:

  1. The Ice Cream Sandwich Wallpaper from WallBase (Download Link)
  2. DeviantArt’s APPOWS2010 taskbar theme for Windows 7 (Download Link)
  3. Create the Dock on the left side with RocketDock with a Blank Theme (Download Site)
  4. DroidPirate’s Ice Cream Sandwich Icon Pack (Download Link)
  5. Rainmeter system monitor and configuration tool for Windows (removed by source)
  6. Display time and date with the Minimal Bar skin for Rainmeter (Download Link)
  7. Display the weather with the Lexis skin for Rainmeter (Download Link)
  8. Display currently playing music in the lower right corner with Simplesentencethree for Rainmeter (Download Link)
  9. Google search bar for Rainmeter (Download Link)
  10. Roboto Light Roboto font (Download Link)

While the entire list above will create the full Android 4.0 experience you can turn on and off the pieces that you want to get it the way you want. Let us know what you think when you have it setup and post any questions you have as well.

Check Your Android’s Battery Level Without Leaving The Foreground

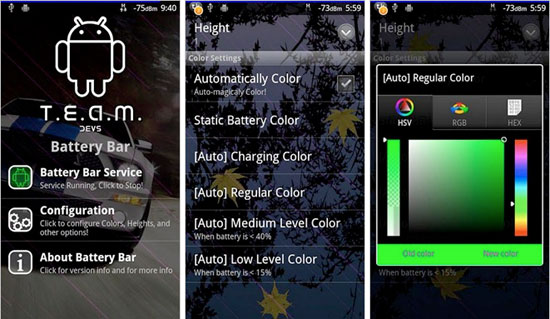
Most of us that want to keep an eye on our battery levels have a widget to keep an eye on it but with “Battery Bar” you never have to leave the foreground. The Battery Bar app was developed by T.E.A.M to allow a custom bar at the top or bottom of your display showing your battery levels.  Of course we have been promised a battery percentage indicator built into Android in our notification bar for a while now but it has yet to come.

Keep in mind that not only does this app allow you to get the great battery levels custom bar that the MUI ROM has had all along but doesn’t require root access to do so. Most earlier options for batter level management have required root and this time its easy for even novice Android users.

TEAM Battery Bar Battery Levels App

Let us know if you have tried the app and what you think about it. Also if you notice any bugs in it let us know that as well so that others may learn from it.

UPDATE: We are finally getting battery percentages on our Android devices via the different manufacturers custom UI’s.  This means Sense and TouchWiz mainly since those both are now including an option to show batter levels.  Android itself also has a more detailed battery usage section under the device settings.  Those of you that wish to continue using this app can do so but you will likely get a more exact battery level from your devices percentage output.

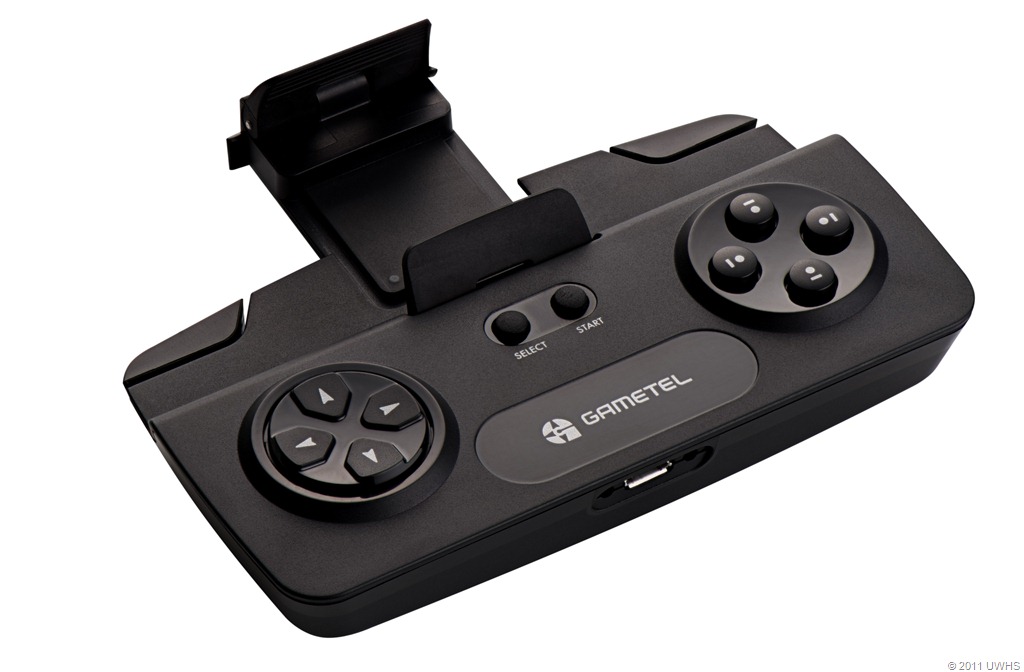
Wireless Bluetooth Game Controller by Gametel

Gametel Wireless Bluetooth Controller for Android Devices

At Unveiled today, Gametel was sporting their new Bluetooth gaming controller which was caught on video courtesy of thedroidguy. The controller connects to your Android device via bluetooth and is 100% wireless. At the top of the controller you will notice a small arm that will hold your device securely to the controller.

According to thedroidguy the controller looks like the slide-out Xperia play controller but feels much better in your hands. Along with this controller being completely attachable you don’t have to keep it attached like many other gaming phones, this way you don’t need to lug it around when using your phone for calls.

The Gametel controller also works with tablets so you can plug the tablet into a tv or just set it up and use the controller to play instead of holding your 10 inch tablet the whole time. The battery life is said to last around 9 hours and prove to be a useful accessory if you play many games on your Android devices.

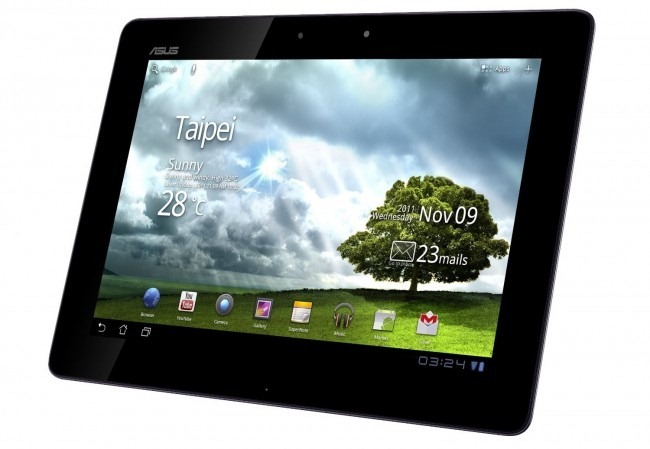
ASUS Eee Pad Transformer Prime TF700T

ASUS Transformer Prime TF700T

ASUS has announced a new tablet called the Transformer Prime TF700T to be an upgraded Transformer Prime TF201. This new tablet is pretty much the same as the 201 with a few upgrades. The differences that you will notice are the upgraded 2MP front facing camera, new black panel design, and a higher resolution of 1920×1200.

ASUS Eee Pad Transformer Prime TF700T Features:

  • 10.1” (1920×1200) Super IPS+ panel, with a 178 degree viewing angle
  • 1.3 GHz Quad core Cortex A9 NVIDIA Tegra 3 processor (with 12 core GeForce GPU)
  • 8MP rear camera with autofocus, LED Flash, and 1080P recording and 2MP front facing camera with HD video chat
  • 32GB/64GB internal memory, plus 8GB of ASUS Web Storage
  • WLAN 802.11 b/g/n and Bluetooth 2.1 + EDR technology
  • 2-in-1 3.5mm jack, micro-HDMI output, and microSD card reader
  • 25WHr lithium-polymer battery (should have the same battery life as the TF201)
  • 263 x 180.8 x 8.3mm and 586g

The major reason for the upgraded Transformer Prime is the fact that they needed a way to fix the GPS issues they had with the original 201. The new design allows ASUS to increase the strength of the WiFi, Bluetooth, and GPS performance. While we hate to see those that jumped into the Transformer Prime TF201 get left with a partially working device, it is once to see ASUS release a fully working model.

It looks like the 32GB version will retail for around $599, while the 64GB version will increase to $699. The device will be available some time in Q2 and will have an optional keyboard dock for $149.

Let us know what you think about the new device and if you will actually upgrade to it or not. We will keep you informed as we find out more information ourselves.

Install Android 4.0 Ice Cream Sandwich on the Original Droid

While the Original Droid is a two year old device, there is an Android 4.0 Ice Cream Sandwich ROM available for the device. CyanogenMod recently stated that they would no longer support the original Droid although XDA member kfazz wouldn’t hear of it and has Android 4.0.3 available for the device. The ROM still has some bugs to work out but as you can see courtesy of talkandroid in the video above it does run quite nice.

How to Install Android 4.0.3 on the Original Droid:

  1. You must have your device rooted and ClockworkMod Recovery on it.
  2. Flash the Ice Cream Sandwich ROM via ClockworkMod (Download Link)
  3. Install the latest Google Apps via gaps (Download Link)
  4. Congrats you have Android 4.0.3 ICS on the Original Droid!

Let us know how you like it and if you have any issues with the process. As always we will keep you updated to the progress of this project. Also we can see here that if this device can run the highly anticipated Android 4.0 then any device could potentially receive the new Android OS.