Android 4.0 Ice Cream Sandwich Source Code Available

Android 4.0 Ice Cream Sandwich Source Code

This week the Android 4.0 Ice Cream Sandwich source code has been uploaded and made available to developers. It seems to be the same build that was leaked meant for the Galaxy Nexus a few weeks ago.

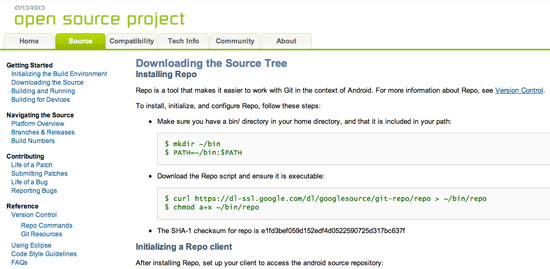
This is actually the source code for version 4.0.1 of Android, which is the specific version that will ship on the Galaxy Nexus, the first Android 4.0 device. In the source tree, you will find a device build target named “full_maguro” that you can use to build a system image for Galaxy Nexus. Build configurations for other devices will come later.

You can get started with the source code by going to http://source.android.com/source/downloading.html and following the instructions there.

With every new source code release we tend to see an increase in ROM’s and other improvements to our devices.  Hopefully since Android is getting so advanced we will start to see the OS grow faster and more stable as the community builds it up without having to rely on one Dictator to do it all.  There are many ROM’s already available but we like to see the smaller names in ROM development come out of the woodwork and create the crazy designs and such.


Unlock Your Doors With Your Android Phone

Lockitron is in the process of creating door locks that are controlled by your NFC (near field communication) enabled Android phone. This could create an atmosphere where nobody would ever need a set of keys to get into their homes. One of the most notable features is the ability to remotely let someone into your house and lock the door behind them when they leave without ever getting up.

The system that Lockitron is working on would be a set of hardware that talks with your router for the “mobile keys” to lock or unlock them. The system will allow a user with an NFC enabled Android device to lock and unlock their doors from anywhere they have an internet connection. The new app driven set of keys will also allow you to text message someone with a one time unlock code to unlock your door as well so that you never have to worry about people getting into your house more than the one time.

It looks like the system will come in at around $300 and of course will require your phone to have the NFC chip in it to function. So currently the only devices that will work with this cool new technology would be the Galaxy Nexus and Nexus S although we are sure to see many more over the next few months.

Barnes & Noble Nook Tablet with Dual Core Processor

Barnes & Noble held an event November 7th in New York to unveil their next Nook device. It was an announcement we all expected to be the Nook 2 but turns out their predecessor is a full on tablet not to be confused with an e-reader any longer. If you don’t believe us check out the 1GHz dual-core OMAP processor and 1GB of RAM its packing.

Nook Color TabletSome of the other notable specifications are that the 1 GB of RAM doubles that of their competition in the Kindle Fire. Also the Nook Tablet boasts 16 GB internal memory with an SD card slot for added storage again doubling the Kindle Fire. The screen is the same 7 inch 1024×600 IPS panel as the Nook Color.  We had assumed that the new Nook Tablet would improve its display although that doesn’t seem to be the case from what we know know.

The Nook Tablet will be running another highly modified version of Android focused on the digital content that Barnes & Noble offers. This modified version of the Android operating system will probably not be accepted by avid Android users but more by those that are in the e-reader demographics.  If Barnes and Noble wants to reach the Android audience that it seems a full on tablet would be suited for they will need to allow their highly modified OS to be slightly less modified.  This aside they are also offering free access to the “Nook Cloud” system for safe storage with your device.

We are sure that one of the first major things you will hear about this tablet within the Android community will be a root method as well as a ROM to flash the device to a more pure version of Android.  As we get more information on the Nook Tablet and ways to modify them in the event you don’t like the skin they have placed on the OS we will let you all know.  In the mean time we would like to hear about what everyone thinks of the new tablet by Barnes and Noble.

HTC Edge the first Quad-Core Phone

HTC has announced unofficially that it will be releasing the worlds first quad-core phone. The device is called the HTC Edge and looks to be a nice looking phone on top of the fastest of its kind. Thanks to PocketNow for the screenshot we can see its look and feel.  You can kind of see that HTC has their own look and doesn’t seem to stray much from it.  This is a good thing though, placing more emphasis on the features and hardware without too much resources on outward design.

HTC Edge Quad-Core Android PhoneHTC Edge Features Include:

  • Android 4.0 Ice Cream Sandwich (Suspected)
  • Quad-Core NVIDIA AP30 Tegra 3 processor
  • 4.7 inch 720p Display
  • 1 GB RAM
  • 8 MP Rear Camera
  • 32 GB internal Storage
  • Bluetooth 4.0
  • Beats Audio
  • HTC Sense 4.0 (According to PocketNow)

This HTC Edge will be exponentially faster than the current “fastest” Android phone although Samsung will likely respond with a device that is at least as good if not one step above the Edge. The expected release date of this powerhouse device is Early Q2 2012. As we get more information we will be sure to let you know.  Of course this device is still just a rumor but we will surely see some quad core devices before you know it.

If you are thinking of waiting for the HTC Edge before you update a contract or jump to another device let us know.  Also if you find any more information on this device let us know in the comments below.

UPDATE: It looks like the HTC Edge may never be released and if it ever does will likely not be called the Edge.  We have seen rumors of this device for a while now but nothing official that seems to back up any of it.  With HTC talking about releasing a few other devices and having official notes on them we can assume this is just a rumor.  If we get anything solid on the HTC Edge we will post another update to make sure you are aware.

Root the HTC Amaze with One Click

The HTC Amaze was rooted a while ago and we completely missed it here at Android Advice. I know we are slackers at times but the instructions to root your HTC Amaze are now available below. On top of this the root method for the Amaze is very easy and is a “One Click” method.  This method is for the Gingerbread ROM.

Take note that you must have the HTC USB drivers installed for the root instructions to work.

Instructions to Root the HTC Amaze:

  1. Download the One Click Root Files (Download Link)
  2. Extract the files to your computers C: drive
  3. Connect your Amaze via USB
  4. Navigate to the Zerg rush folder
  5. Click and run ZergRushTempRoot.bat
  6. Be Patient while it does its thing
  7. Reboot your Amaze
  8. Congrats your device is rooted!

After you have rooted your device be sure that you have Superuser installed and enjoy giving apps root access and installing your custom ROM’s (when available)

One Click Root the HTC Rezound

The HTC Rezound was just announced and has already been rooted.  Even better than having your device rooted before you ever get it is being able to find a “One Click” root method. A member over at XDA found that the same one click root method that is used when rooting the HTC Amaze works on the HTC Rezound.  What this means is that you can easily root your Rezound as soon as you get it without having to worry about a command line method.  The expected release date of the HTC Rezound is November 14th.

Also with the one click root methods there is much less risk of bricking your new device since you will not be manually typing the line commands yourself.  Lets be honest even reading through our articles you likely see many mis-spellings and that is with autocorrect, spell check, and a proof reader.  So with little more fluff here is the method below.

Take note that you must have the HTC USB drivers installed for the root instructions to work.

Instructions to Root the HTC Rezound:

  1. Download the One Click Root Files (Download Link)
  2. Extract the files to your computers C: drive
  3. Connect your Rezound via USB (preferably a rear connection for stability)
  4. Navigate to the Zerg rush folder from the download in step 1
  5. Click and run ZergRushTempRoot.bat
  6. Be Patient while it does its thing it may take a bit
  7. Reboot your Rezound
  8. Congratulations your device is rooted!

After you have rooted your device be sure that you have Superuser installed which you can find on the Android Market.  Now enjoy giving apps root access and installing your custom ROM’s (when available).  Of course there are risks of using a rooted device since there is nothing stopping you from changing system files or even removing them so be careful doing anything you aren’t sure of.  This being said if you do have any issues please let us know and we will try to help you out.

Let us know if you have any issues with the one click method as well as how its running for you after the root.  We will keep you updated as there are more ways to root the Rezound even though we can’t imagine there will be an easier method that this.

Root the Motorola Atrix 2 Manually

The Motorola Atrix 2 has only been out a short time and it can be easily rooted manually using the method originally developed for the Droid Bionic. This root method was originally created by p3droid at MyDroidWorld and Android Advice takes no credit for the root method. We are just here to make sure you know how to and understand it.

Manual Root Instructions for the Motorola Atrix 2:

  1. Download and extract exploit.zip (Download Link)
  2. Open a command prompt and navigate to the folder you just extracted
  3. Type “adb push zerg /data/local” press enter
  4. Type “adb push su /data/local” press enter
  5. Type “adb push Superuser.apk /data/local” press enter
  6. Type “adb shell” press enter
  7. Type “cd /data/local” press enter
  8. Type “chmod 777 zerg” press enter
  9. Type “./zerg” press enter
  10. Wait for it to complete the root process
  11. Type “adb shell” press enter (skip if already in shell)
  12. Type “mount -o rw,remount /dev/null /system” press enter
  13. Type “cat /data/local/su > /system/bin/su” press enter
  14. Type “cat /data/local/Superuser.apk > /system/app/Superuser.apk” press enter
  15. Type “chmod 4755 /system/bin/su” press enter
  16. Type “chmod 4755 /system/app/Superuser.apk” press enter
  17. Type “reboot” press enter
  18. Congrats your Motorola Atrix 2 is Rooted

If this root method does not work for you check out the “One Click Atrix 2 Root Method“. Please leave comments letting us know how this works out for you and any issues that you run into if any.

One Click Root Method for the Motorola Atrix 2 Available

The Motorola Atrix 2 has only been out a short time and it already has a manual and one click root method available. This root method was originally created by p3droid at MyDroidWorld and compiled for the Motorola Atrix 2 by JRW 28.  This of course is the safest way to root any Android device since it doesn’t rely on you working through command line and leaves little room for error.  This being said, keep in mind that there is always a risk when rooting any Android device so use the instructions and download below at your own risk.

After rooting your Motorola Atrix 2 you will be able to install many apps that don’t work on stock ROM’s as well as backup tools like Titanium Backup.  Rooting will also allow you to create a stock ROM backup so that you can restore your device with your settings and apps all in tact without the need of flashing completely stock and re-installing and setting everything up.

Root Instructions for the Motorola Atrix 2:

  1. Download and extract the 1-click-exploit (Download Link)
  2. Enable USB Debugging on the Atrix 2 via “Settings -> Applications -> Development
  3. Connect your Atrix 2 to the PC via USB (preferably a rear connection if available)
  4. In the notification bar change connection type to charge only
  5. Click and run runme.bat
  6. Be patient and wait for your Atrix 2 to reboot
  7. Congratulations your Motorola Atrix 2 is Rooted

If this one click root method does not work for you or you have any questions about the method please let us know and we will try to help you figure out what may have went wrong. We will have a new article shortly with the manual root method for the Atrix 2 for those of you that are interested in manual root instead of the automated method above. Please leave comments letting us know how this works out for you.

Root the Casio Commando After Gingerbread Update

If you have a Casio Commando and have already updated to Android 2.3 Gingerbread then this is the way to root your device after the update. This root method does require you to have the Android SDK on your computer and if your using windows be sure to install the C771 USB drivers. Its really quite an easy process.

Root Instructions for the Casio Commando:

  1. Casio CommandoDownload and unzip su.zip (Download Link)
  2. Download and unzip zergRush.zip (Download Link)
  3. Download Superuser.apk (Download Link)
  4. Connect your Casio Commando to your PC via USB
  5. Open a command prompt on your PC
  6. Navigate to your Android SDK directory
  7. type “adb shell mkdir /data/local/tmp” press enter
  8. type “adb push [path to zergRush]\zergRush /data/local/tmp” press enter
  9. type “adb shell chmod 755 /data/local/tmp/zergRush” press enter
  10. type “adb shell/data/local/tmp/zergRush” press enter
  11. type “adb remount” press enter
  12. type “adb push [path to su]\su /system/bin” press enter
  13. type “adb push [path to su]\su /system/xbin” press enter
  14. type “adb shell chmod 4755 /system/bin/su” press enter
  15. type “adb shell chmod 4755 /system/xbin/su” press enter
  16. type “adb install [Path to Superuser.apk]\Superuser.apk” press enter
  17. type “adb reboot” press enter
  18. Congrats your Casio Commando is Rooted

Lookout Mobile Security for Android Tablets

Lookout Mobile Security has been the number one security application for Android devices for a while now. Until today the popular app has not been available on tablets. Also if you decide to get the paid version of Lookout Mobile Security on both your tablet and phone you only have to pay for the one account.

Lookout Mobile Security QR Code
Scan to Download Lookout Mobile Security

Lookout Mobile Security Features with Free Version:

  • Antivirus: Block malware, spyware, and trojans.
  • Scan each app you download to make sure it is safe.
  • Schedule daily or weekly scans. Get automatic, over-the-air, protection against the latest threats.
  • Locate your lost or stolen phone on a Google map even if GPS is turned off!
  • Activate a loud alarm, even if your phone’s on silent.
  • Log in to myLookout.com to locate your phone from any web browser, anywhere!
  • Securely backup your contacts to myLookout.com
  • Restore them to an existing phone.

Lookout Mobile Security Additional Features with Paid Service:

  • Safe Browsing: Block phishing and malware sites from links in text messages, on the web, and more.
  • Remote Lock & Wipe: Securely lock your phone if it’s lost or stolen to prevent others from accessing your phone and remotely delete sensitive data on your phone if needed.
  • Privacy Advisor: Identify which apps can access your sensitive data like contacts, location, SMS text messages & identity info.
  • Advanced Backup: Backup and restore photos and call history in addition to contacts. Restore them to a new device.