Motorola Xoom 2 and Xoom 2 Media Edition Tablets

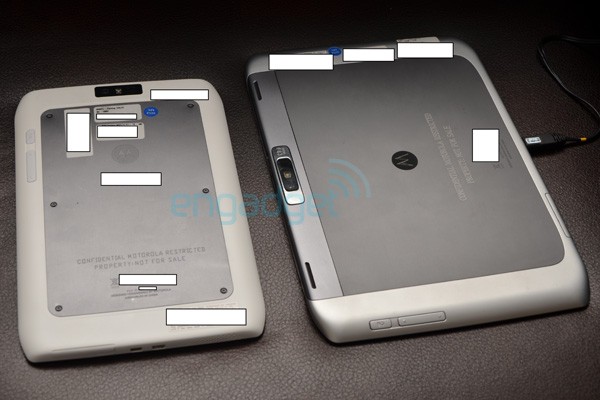
There has been recent buzz about a Motorola Xoom 2 and Xoom 2 Media Edition floating around. The Xoom 2 will like its previous version be a 10.1 inch tablet while the Xoom 2 Media Edition will be a smaller 8.2 inch version. Both of these tablets will be 9.3 mm thick running Android 3.2 Honeycomb. It has also been leaked that they will also both have LTE compatibility built in out of the box.  This being said there is no news on which carrier will carry the LTE versions but we can assume that it will probably be Verizon based on their relationship with Motorola.  Verizon is usually the first to get Motorola devices.

A few things that we notice are that the devices will have rear buttons like the original Xoom and seem to have the same solid structural design.  We can also tell that the devices will both have front and rear camera’s.  The only other thing that we currently know is that the Xoom 2 and Xoom 2 media editions will have the standard micro USB connection for charging and computer connections as well as micro HDMI connections for HDTV’s.  We don’t have much more than this to report at this time but will let you know as we find out more.

If you are thinking of getting one of these tablets let us know as they will likely end up being quite an upgrade from the original Xoom. Although the original one is still staying up to date with OS version and still has great hardware.  Let us know what you think about the newest tablets from Motorola and if you think they can compete with others like them currently on the market.

How to Flash Droid Bionic Back Stock

Flash your Motorola Droid Bionic 4G to its Stock ROM

The Motorola Droid Bionic was not even out yet when it was first rooted and now even has a “One Click Root” available. For those of you that have been playing with the device and either have bricked it or just need to get it back to factory setup these are the instructions for you.

Flash the Motorola Droid Bionic back to Stock:

  1. Install the Droid Bionic Drivers (Download Link)
  2. Install RSD Lite on a PC (Download Link)
  3. Backup your Droid Bionic (We recommend Titanium Backup)
  4. Reboot (or turn on) your phone into Fastboot mode (hold vol down while powering on)
  5. Plug your Bionic into your PC via USB
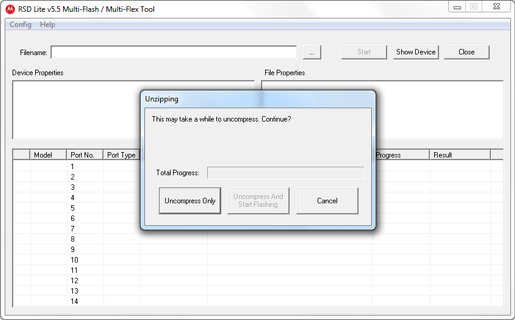
  6. Run RSD Lite on your computer
  7. Press the “…” button beside “Filename”
  8. Open the FXZ Recovery file (Download Link)
  9. Wait for the file to load and press “Uncompress and Start Flashing”
  10. Be patient it will take a few minutes to complete flashing
  11. Once complete the Droid Bionic will reboot and install the 2 radio images
  12. Congrats your Motorola Droid Bionic is Restored!

For those of you wondering why this is an FXZ and not an SBF they are basically the same thing.

HTC Flyer Unlocked Bootloader via HTCDev

HTC Flyer
HTC Flyer bootloader unlocked courtesy of HTCDev.com

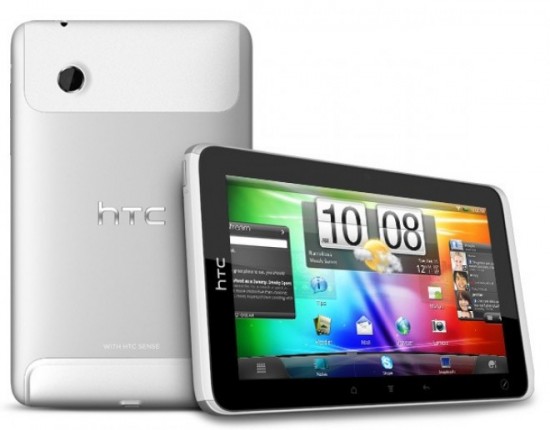
HTC has been on a roll releasing unlocked bootloaders for devices. The most recent being the 7 inch HTC Flyer courtesy of HTC’s development website. They have unlocked the bootloader for multiple versions of the Flyer including the international 3G and WiFi versions.

Before you head over to HTCDev.com you will need to know the version of the Flyer you own to be sure you get the correct firmware version. Also be sure you are fully up to date for the update tool otherwise it may fail. You can find the new firmware and update it at HTCDev.com on the bottom right of the unlocked bootloader list.

Now that you can unlock the bootloader it will allow you to install custom firmware on your pretty little HTC Flyer. Also take note that just because HTC offers the tools to unlock the bootloader that it still voids your warranty. Only do this if you are comfortable with how your device functions.

Intel Atom E series to get Android Gingerbread in 2012

intel android tablet

Intel has fallen so far behind in the mobile market that it doesn’t seem they will ever catch up. One way they will try is to bring Android Gingerbread support to the Intel Atom E series processors. They have fallen so far behind because their chipsets are in no way efficient enough to support mobile devices due to power restraints. This custom version of the Atom E will get Gingerbread next year but in my opinion supporting Gingerbread is just staying a little less behind than they were previously since there is already Ice Cream Sandwich and Honeycomb with Jellybean close at hand.

Carrypad has reported that Intel is looking at an open source version of Android 2.3 Gingerbread to support manufacturers interested in using the Atom E series chipsets in tablets and other mobile devices. This means that the processors would require this customized version of Android to support their chipsets and that it will be optimized for battery life.

How to UnRoot the Droid Bionic

UnRooting the Motorola Droid Bionic is as easy as “One Click” (well just as easy as rooting these days actually). We previously created a few different articles to show you how to Root the Droid Bionic and one of those was a OneClick method. Now to UnRoot you use that same method but in a different way.  This method is quite easy although please be sure that you follow every step and don’t stray or you risk a fancy paper weight.  This being said you likely can make mistakes and still be fine just want people to be aware that there is always a risk.

Instructions to UnRoot the Droid Bionic:

  1. Download and unzip PetesMotorolaRootTools.zip (Download Link)
  2. Make sure USB Debugging is on “Settings -> Application -> Development”
  3. Connect your Bionic to your computer
  4. Run the Pete’s Motorola Root Tools.exe
  5. Select UnRoot My Phone at the bottom
  6. FYI … Your phone will reboot several times throughout the process

Its that easy. You now have removed root access from the Droid Bionic and can send it in to be fixed or whatever your reasons are. If you have any issues with this method please let us know as well as any questions you have about the process.  We are here to be informative and keep in mind that any time you try to flash, root, unroot, etc. you are taking a risk and we are in no way responsible for the outcome.  This method has been tested and worked without a hitch so we can assume the same for you.

Enable Wi-Fi Tethering on the Droid Bionic

Apparently its very easy to enable tethering on the Droid Bionic. Of course in order to get the tethering enabled you need to root it so follow this article to “Root the Motorola Droid Bionic” first.

Verizon and Motorola both have made the tethering more secure with the Droid Bionic than previous devices although we all knew that it was only a matter of time before someone got around it. In this case it was XDA member ddv2005 that found a way to enable tethering by changing one line using SQLLite Editor.

Instructions to enable Tethering on the Droid Bionic:

  1. Download and install SQLLite Editor
  2. Modify settings.db for “Settings Storage” application
  3. “Setting Storage Application is com.motorola.android.providers.settings
  4. Set “entitlement_check” to 0
  5. Reboot the Bionic
  6. Congrats your Done!

All of us that have or have had a device on the Verizon Network know that they are a very expensive carrier.  While they may have the best coverage of any other US based carrier we still want to be able to save where we can and in this case there would otherwise be a $20 fee associated with unlocking the built in Wifi Tethering features of the Droid Bionic.

If you enable tethering on the Droid Bionic please let us know how everything went and if you ran into any issues along the way as we would like others to hear your experience to help them in the event they run into the same issue.  Good luck and I hope you all enjoy connecting your other devices to the internet via your nice little Droid Bionic.

Herotab M6 Android 2.3 Gingerbread Tablet

For those Android fans out there who just don’t want to pay the big bucks for a high end Android tablet the Herotab M6 is for you. The price point on this 7 inch Gingerbread tablet is only $159. On top of the price it comes with a free screen protector and shipping.

This will probably not be one of the thinest tablets out there or even very solid for that matter.  Its a low end tablet so don’t expect it to compare to the Galaxy Tab by any means but it does come with some pretty good specs for its price.

Herotab M6 Features:

  • 7 inch capacitive touch display
  • Android 2.3 Gingerbread
  • 1 GHz processor
  • 8 GB internal storage
  • micro SD support
  • full sized USB port

The Herotab M6 is not your standard Android tablet as it doesn’t have the standard home, menu, search, back buttons. It just has 1 button like the iPad. Even though it may not be the fastest, lightest, or thinnest it is a great tablet for the price.

UPDATE: We went ahead and bought a Herotab and have to say that for the price its not a bad tablet.  It does have a responsive capacitive touch screen instead of the cheap resistant screens that many budget tablets tend to have.  The feel of the tablet is not bad other than being a little thicker than we like.  The hardware seems to run Gingerbread rather well, we haven’t noticed any lag when running apps.  If you are looking for an in-expensive Android tablet this is the one to try.
ShopKick List of Barcodes (Get Free Giftcards)

If you have Shopkick on your phone then you know how easy it is to get free gift cards with Kick points. If you don’t you should get it. When your out and about you can scan items in stores and get points that can be converted into gift cards for places like BestBuy.


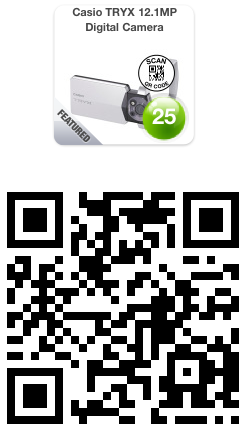
Scan QR Code to Download ShopKick

If you don’t have Shopkick download it from the Android Market and Enter in promo code “kudu9136” to get 100 free kicks right from the start. (this is a random promo code I found online but works)

Once you have ShopKick on your phone then you can use the following barcodes to get kicks from stores without actually being there. We do however recommend that you be close to the store that you are scanning items for so that you don’t get banned.

It is recommended that you at least be near if not in the parking lot of the store when scanning although you can scan from anywhere at your own risk.

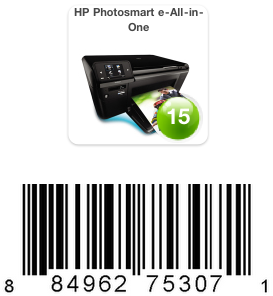
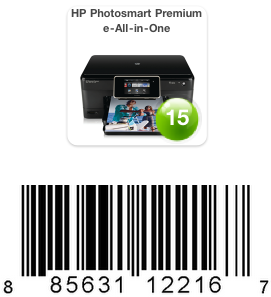
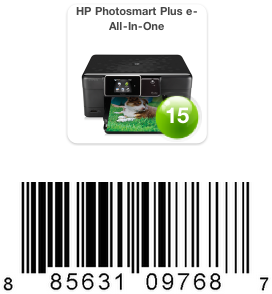
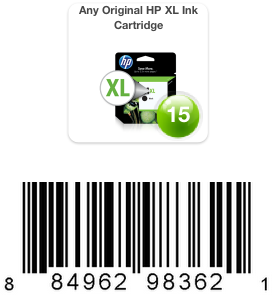
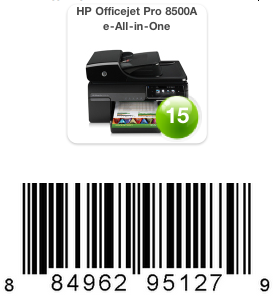
BestBuy ShopKick Barcodes:

ShopKick Barcodes for Popular Stores:


We will be adding more as we get them.  These will be updated periodically with new barcodes as they change and new ones are found by us. If you have any barcodes please leave them for us and we will be sure to add them to the list.

Motorola Droid Bionic OneClick Root

The Motorola Droid Bionic was rooted before it was even released although it was a process that needed to be followed very precisely or you risk bricking your nice new device. Now there is already a “One Click Root Method” available for the Droid Bionic that takes a lot of that risk out of your hands and makes it easy for anyone to root their device not just advanced users.

Rooting the Droid Bionic using the One Click method while easy still incurs some level of risk so be careful and pay attention to what you are doing.  As always we are in no way responsible if you brick your phone as we are the messenger and you take it upon yourself to give this a shot.  This being said it has been tested and works very well on every device we attempted it on.

Motorola Droid Bionic One Click Root Instructions:

  1. Install your phones drivers (Download Link)
  2. Enable USB Debugging on your Droid Bionic
  3. Plug your Bionic into your PC and select “Charge Only”
  4. Run MotorolaOneClickRoot.exe (Download Link)
  5. Follow the Instructions and Congrats your Rooted!

Thats about as easy as it gets for now. If you have any issues or questions please let us know in the comments below. Also be sure to avoid any OTA updates as they may remove your root privileges and in that event there may or may not be a new method available.  In most cases however you would only need to wait a few weeks at best to get the newer root.

Also please let us know if you know of any other root methods available for the Droid Bionic as we have seen a few others that seem to work but nothing that was quite this easy.  We are always interested to know how you got root access to your device and it helps us with answering questions when others ask.

Get Free Full Version Android Apps from GetJar

GetJar Logo

GetJar has announced their newest program today called GetJar Gold.  This is the newest of many Android App offerings that GetJar has created to make themselves one of the top dogs.  This new business model allows for users of the GetJar app to get many premium Android Apps for free.

GetJar through GetJar Gold will have apps that usually retail at up to $10 now free on a weekly basis.  Examples of Apps that are already available are Age of Zombies, TuneIn Radio Pro, Solo, Paper Glider and Backbreaker.

GetJar has stated that unlike Amazon’s free app a day that developers will be impressed with the terms of service.  It seems that developers will be paid on a per install basis along with the increased exposure.

GetJar’s Press Release:

SAN MATEO, Calif., Sept. 8, 2011 – GetJar, the world’s largest free app store, has introduced GetJar Gold, a program that gives consumers free ongoing access to premium applications that they would have to pay for on other app stores.

The same premium Android apps that cost up to $10 on Android Market or Amazon App Store are offered free as part of GetJar Gold. New premium apps are added to GetJar Gold every day and remain on the store. All apps are available for download at no cost, saving consumers potentially hundreds of dollars over time. With 30 million active monthly users, GetJar is set to give away millions of dollars worth of apps.

GetJar carefully selects only the best apps for theprogram from popular categories like games, entertainment, and productivity.  Titles currently available for free through GetJar Gold include Age of Zombies, TuneIn Radio Pro, Solo, Paper Glider and Splashtop Remote Desktop.

“We think this is something great that GetJar is doing and we’re excited to be a part of it,” said TuneIn Radio CEO Bill Moore.  “The industry has realized that what consumers want are premium apps without cost, but how to make it sustainable has been the big question.  GetJar has developed a business model to make free apps work.”

GetJar Gold works for everyone; consumers receive premium applications for free, developers are compensated, and advertisers enjoy the increased site traffic generated by the program. GetJar pays developers on a per-install basis, and gives them more exposure since free applications are downloaded 10 to 20 times more often than paid apps.

“We are able to develop programs like GetJar Gold because of our open and free business model,” said Ilja Laurs, CEO and Founder of GetJar.  “We regret that at this time we cannot extend our program to iPhone users, as Apple runs a closed ecosystem that does not allow for competing app distributors like GetJar. Unfortunately, iPhone users will have to continue paying for the very same apps that their Android counterparts enjoy for free.”