Lookout Mobile Security Helps Google Clean 26 Malicious Apps from Market

Lookout Mobile Security has identified 26 new apps on the Android Market presumed to include the DroidDream malicious code that hit Android Market a few months ago. These 26 applications were found thanks to Android developers that noticed their apps being repackaged and uploaded to the Market under a different developer name. These developers notified Lookout Mobile Security who identified them as malware after putting the apps through their scanning software. After alerting Google, all 26 apps that were known to be infected were removed from the Google Android Market.

You can never beat common sense when installing anything onto your device but Lookout Mobile Security makes it so much easier. Always make sure to check exactly what permission newly installed apps are requesting BEFORE YOU INSTALL and not after. Although, I’ve also heard that apps don’t necessarily need to display all permissions they require if a developer doesn’t want it to.

Lookout Mobile Security QR Code
Scan to Download Lookout Mobile Security

Hopefully Google can start scanning the apps themselves as they are uploaded and require some sort of approval process. I’m not saying that they need to decide who can and cannot place their apps in the market, more of a quick check that the app doesn’t already exist and that there isn’t a flipping virus in it. I download apps from all over the place but those that only use the Google Market should be safe even those without common sense.

aDownloader BitTorrent Client for Android

Whats the best Bittorrent Client For Android?
aDownloader is a native bit torrent (bittorrent) downloader for Android phones. You may search online torrent and or add torrent from local sdcard.  You may also use aDownloader as a HTTP downloader: In the Android browser, long press the link you want to download, select “Share link”, and select aDownloader to download.


aDownloader QR Code
Scan Code to Download aDownloader


Of course, download files will consume the battery very quickly and consume a lot of bandwidth, so this is to run only when you are connected to WiFi and probably also to the power supply.

Of all the Torrent downloaders available for Android, aDownloader is by far the most fully functional torrent client available.  Its free and unlimited, what more can you ask for.


ViewSonic dual-boot ViewPad 10 Pro

ViewSonic has unveiled many new tablets including their dual-boot ViewPad 10 Pro this year at Computex. The company unveiled their 10-inch, dual-booting Windows 7/Android 2.2 ViewPad 10Pro along with their 7-inch, dual-core ViewPad 7x with Honeycomb.  We would like to see the other tablet manufacturers make it in the market with big names like Motorola and Samsung and this seems to be a device that could make a name for ViewSonic in this market.

While being called dual-boot the ViewPad 10 Pro is really a Windows 7 tablet that runs a virtual Android Environment beside it. This makes it easy to switch between the two as required.  If this is done correctly it could prove to be a great device.  With this there is also a lot of room for compatibility errors as well as bugs from having to run and OS on top of another.  Hopefully they have figured out how to keep the resources from being completely depleted by the amount of resources that Windows will require causing Android to run very slow.

Viewsonic ViewPad 10 Pro features:

  1. 1.5GHz Intel Oak Trail Processor
  2. 32GB of storage
  3. 1080p playback
  4. 3500mAh battery (up to 4.5 hours of 1080p playback)

Personally I am a huge fan of Android (obviously) but do have a need for Windows when doing presentations and other business related tasks that are sent between myself and others.  If the device has the hardware to support the “dual boot” capabilities we will love this device.  This being said I am really looking forward to playing with one of these ViewPads.

If you decide to get one of these ViewPad’s please let us know how you like it and how it runs.  If you run into any bugs, speed issues, or compatibility problems that weren’t foreseen I would like to know about that as well.  Only time will tell so lets hold tight and see where this thing goes.

How to Root T-Mobile G2x

The T-Mobile G2x is one of T-Mobiles the more popular Android Phones of 2011 which they have had issues with of late. Many of its users are having issues that can be taken care of by simply rooting the phones and cleaning them up. If you are one of those that own and want to root your T-Mobile G2x we have the method below.

Root Instructions:

  1. Download the latest SuperOneClick.zip file to your Windows computer (download link)
  2. Extract the files from the .zip file into a new folder on your PC.
  3. turn on USB debugging (Settings -> Applications -> Development- > click USB Debugging)
  4. Plug your phone in to your PC via USB
  5. Open the folder with SuperOneClick and double click “SuperOneClick.exe”.
  6. Allow the process to run and enjoy being rooted.

We have not rooted the T-Mobile G2x’s ourselves but have seen many other users saying that this root method works. We are however not responsible for your use of this information and have to tell you that you assume all risks of following the steps above.


How to Root LG Optimus 2X

The LG Optimus 2X is one of the more popular Android Phones of 2011. With so many users talking about this smartphone there is no doubt that a root method would exist. We have played with this phone and think its a good phone for most Android fans. If you are one of those that want to root your LG Optimus 2X we have the method below.

Root Instructions:

  1. Download the latest SuperOneClick.zip file to your Windows computer (download link)
  2. Extract the files from the .zip file into a new folder on your PC.
  3. turn on USB debugging (Settings -> Applications -> Development- > click USB Debugging)
  4. Plug your phone in to your PC via USB
  5. Open the folder with SuperOneClick and double click “SuperOneClick.exe”.
  6. Allow the process to run and enjoy being rooted.

We have not rooted the LG Optimus 2X’s ourselves but have seen many other users saying that this root method works. We are however not responsible for your use of this information and have to tell you that you assume all risks of following the steps above.


SuperOneClick Root Method

SuperOneClick by far supports the most phones of any other root method available at this point.  While it may not be the best meted for your phone it probably supports it.  SuperOneClick was developed by shortfuse.org and supports over 25 phones including most HTC, Motorola, Samsung and Sony Android Phones.

Operating systems that SuperOneClick Currently Supports are:
Windows Vista, Windows 7, Ubuntu Hardy (8.04 LTS), Ubuntu Jaunty (9.04), Ubuntu Karmic (9.10), Ubuntu Lucid (10.04 LTS), Ubuntu Maverick (10.10), Debian Lenny (5.0), Debian Squeeze (testing), Debian Sid (unstable), Debian Experimental.

Please take note that if you are running Microsoft Windows XP, install .NET Framework v2.0 or above, and if you run a Mac or another Linux flavor, make sure you install Mono

The current compatable and tested phones are:
Acer Liquid Metal, Dell Streak, HTC Magic (Sapphire) 32B, HTC Bee, LG Ally, Motorola Atrix4G, Motorola Charm, Motorola Cliq, Motorola Droid, Motorola Flipside, Motorola Flipout, Motorola Milestone, Nexus One, Samsung Captivate, Samsung Galaxy 551 (GT-I5510), Samsung Galaxy Portal/Spica I5700, Samsung Galaxy S 4G, Samsung Galaxy S I9000, Samsung Galaxy S SCH-I500, Samsung Infuse 4G, Samsung Galaxy Tab, Samsung Transform M920, Samsung Vibrant, Sony Ericsson Xperia E51i X8, Sony Ericsson Xperia X10, Sprint Hero, Telus Fascinate, Toshiba Folio 100.  Keep in mind that just because the phone is not in this list does not mean that it doesn’t work just that it hasn’t been confirmed as working.

Root Instructions using SuperOneClick:

  1. Download the latest SuperOneClick.zip file to your Windows computer (download link)
  2. Extract the files from the .zip file into a new folder on your PC.
  3. turn on USB debugging (Settings -> Applications -> Development- > click USB Debugging)
  4. Plug your phone in to your PC via USB
  5. Make sure your SD card is unmounted (we recommend taking it out)
  6. Open the folder with SuperOneClick and double click “SuperOneClick.exe”.
  7. Allow the process to run and enjoy being rooted.

We have rooted many devices ourselves and have seen many other users saying that this root method works.  We are however not responsible for your use of this information and have to tell you that you assume all risks of following the steps above.


How to Root Samsung Infuse 4G

The Samsung Infuse 4G is by far one of the most popular Android Phones this year. With so many users of this smartphone there is no doubt that a root method would exist. We have played with this phone and think any power user of Android Phones would consider this as a choice. Of course anyone in the Android community that owns a phone like this will either want it rooted or already have it rooted. If you are one of those that want to root your Samsung Infuse 4G we have the method below.

Root Instructions:

  1. Download the latest SuperOneClick.zip file to your Windows computer (download link)
  2. Extract the files from the .zip file into a new folder on your PC.
  3. turn on USB debugging (Settings -> Applications -> Development- > click USB Debugging)
  4. Plug your phone in to your PC via USB
  5. Open the folder with SuperOneClick and double click “SuperOneClick.exe”.
  6. Allow the process to run and enjoy being rooted.

We have rooted two Samsung Infuse 4G’s ourselves and have seen many other users saying that this root method works. We are however not responsible for your use of this information and have to tell you that you assume all risks of following the steps above.

Why Phone Manufacturers and Carriers want a locked bootloader

First things first we are supporters of the mods, hacks, and roots found throughout not only our site but XDA and all others.  We feel as an owner of a device we should fully own it (seeing as we pay for it).  If you have the knowledge or can find it then you deserve the perks of using anything and everything the device can accomplish.

It provides security – both financially to your carrier, and to the end user.

When we say locked bootloader, what we mean (most of the time) is a disk image that checks the important parts of the phone as it boots up, looking for the proper signature.  Let’s break that down, as simple as we can.

When you turn on your phone, the bootloader gets things going, then passes off control to the boot image.  The boot image loads the phone’s kernel, then loads Android, following instructions found in those files.  You copy this boot image to a phone by flashing it to the phones internal system memory, not the RAM or running memory, but the physical flash storage in the phone. That’s why there’s a potential for danger. Screw this up, and you could really screw up your phone, turning it into a “brick.” Depending on how you’re hacking into it, that might be more than a mere possibility. It varies from phone to phone.  Some phones can avoid “bricking” their phones due to the fact that they have images of their default system setup available either on the phone or through the manufacturer (thank you motorola)

If you have a locked bootloader, you can only flash boot images that have been digitally signed with a string of information direct from the manufacturer.  You can’t build your own and flash it to the phone.  The recovery partition is the same way, it’s checked for the right signature, and if it doesn’t have it, you can’t write a new one to the flash memory.  This really only means one thing: We can’t load custom kernels or start-up files on phones with a locked bootloader.

Gaining root access is still possible with a locked bootloader.  Root is just a security breach on a running system, then copying files that make it easy to break that security whenever needed to access any area you want.  Every Android phone can be rooted at this point almost days after release.

If all you can run on your phone is software that has been approved by both the manufacturer and the carrier, it’s easier for them to keep your phone secure and working as intended.  This would be the perfect solution, except that by the time they send out a security or bug fix, new issues have been found.  It’s a never-ending cycle, and locking the phone down to approved software helps the carriers and manufacturers administer it.  Most Android phone owners have no idea how to go about loading patches and fixes themselves, and carriers/manufacturers are supporting millions of phones not just yours.

And then there’s the monetary damage we can do to the carriers.  Yes, real damages.  PRL hacks that enable 3G roaming on Verizon towers with your mobile phone can cost Sprint money.  So does enabling HSPA + on some phones, bypassing T-Mobile’s data throttling, unauthorized wireless tethering, changing slot cycles, and removing Bing and taking away the traffic that was promised to Microsoft.  These policies seem unfriendly to us, but your cell carrier loses revenue every time you do any of it.

How to Root the LG Revolution

These are the instructions on how to root the LG Revolution using the rageagainstthecage binary. The process is easier than it looks although if you feel like it may be too much for you to attempt there will likely be a new method available that is even easier since this is the first one available and it is available so quickly.

Before rooting your LG RevolutionYou will need to have adb access so you will need to download the Android SDK for this. Also keep in mind this phone has no recovery at this point, so there is no way to back track.  We have faith there will be a flash for this at some point but there isn’t one yet.

Root Instructions for the LG Revolution

  1. You will need to download the rageagainstthecage binary file ( download file ).
  2. Place the file in your platform-tools folder of the Android SDK.
  3. In terminal type:
    • adb push rageagainstthecage-arm5.bin /data/local/temp/rage
    • adb shell chmod 777 /data/local/temp/rage
    • adb shell ./data/local/temp/rage
  4. After it roots you will need to push the SU binary which you can download from wikifilez (Download):
    • exit adb push su /system/bin adb shell chmod 755 /system/bin/su

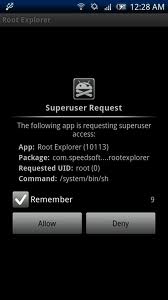
You are done with the root process and now just need to download SuperUser to give SU rights to other applications. You can find the superuser app in the Android Market and install it from there. Once your done you will notice that when your device tries to get root access to anything it will popup first and ask you to allow access.

We are excited about this root method being released so soon after the phone itself was released and are starting to see a trend in root access becoming easier for each new phone. Perhaps the manufacturers are realizing that its a waste of time and effort to lock the devices down because no matter what it will get cracked.

Motorola Atrix Banking App Fix

One of the biggest setbacks of the Motorola Atrix was the lack of HSUPA which was enabled through the 4.1.83 update earlier this month. Unfortunately, this update had created the inability for Atrix users to access most banking apps such as the “Bank of America” and the “Chase” apps.

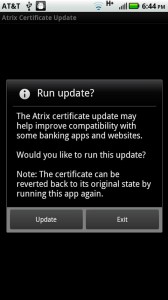
Motorola released an application called the “Atrix Certificate Updater” to address the banking applications errors.

An issue was discovered with the roll-out of 4.1.83 Atrix 4G software that caused some mobile banking applications to no longer work.
If you are using a mobile banking application that no longer allows you to login, this application may be able to help.

Atrix Banking App Fix QR Code
Scan Code to Download Atrix Banking App


To use the Atrix Certificate Updater app, you must have the 4.1.83 firmware installed on your Atrix 4G and follow these instructions:

  1. To update the certificate, open the installed Atrix Certificate Updater app and follow the prompts
  2. After updating the certificate, the phone HAS to be rebooted to make the new certificate work.
  3. You can revert the change by re-launching the Atrix Certificate Updater app again.

Everyone that has used this app has reported at this point no other issues.  It seems to just fix the certificates and effects nothing else.