How to Factory Reset the HTC One X

With the HTC One X being one of the most popular phones available right now what do you do when you want to sell it or just wipe it out and start over? Well doing a factory reset on the HTC One X is easier than you might think with two ways to accomplish it. If your phone just won’t turn on skip to the second method.

HTC One XHTC One X Factory Reset from Settings:

  1. Go to the HTC One X Settings
  2. Navigate to “Storage” -> “Factory Data Reset”
  3. Select “Reset Phone”
  4. Then Tap “Erase Everything”
  5. Wait for the Reset and your done

HTC One X Factory Reset (Can’t get to Settings)

  1. Hold the volume down button and power button
  2. When you see three Android images release all buttons
  3. Press Volume down to “Factory Reset”
  4. Press the Power button to select
  5. Wait for the HTC One X to Reset

If your in a state not mentioned here or have any issues with either process please feel free to let us know and we will try to help. Also keep in mind that doing a factory reset on the HTC One X will clear out all data on the device and cannot be undone.

HTC One X Kernel Source Code Released by HTC

HTC One X Kernel Source Code Released

The HTC One X is HTC’s preemptive strike against the upcoming Samsung Galaxy S3. The HTC One X is easily one of if not the best Android smartphone available right now and with that HTC has already released the kernel source for the popular device. HTC has been releasing kernel source codes to comply with their Open Source guidelines for almost a year now and this is why we love HTC.

You can get the kernel source from the HTC developer portal for all variants of the phone except for the AT&T version that seems to be behind the curve for whatever reason. AT&T seems to be the issue and not the device itself although HTC still seems committed to unlocking all phones:

HTC is committed to listening to users and delivering customer satisfaction. Since announcing our commitment to unlockable bootloaders, HTC has worked to enable our customers to unlock the bootloader on more than 45 devices over the past six months. In some cases, however, restrictions prevent certain devices from participating in our bootloader unlocking program. Rest assured, HTC is committed to assisting developers in unlocking bootloaders for HTC devices and we’ll continue to unlock additional devices in the future.  -HTC Corporation

We noticed that AT&T was the last to allow unknown sources on many devices early last year and now it seems they are having the same issue letting go of the HTC One X. As done with the earlier Android devices we will surely see the community change AT&T’s mind in the long run.

Disable and Block Nook Color OTA Updates

SQLite Editor for Android

If you have your Nook Color the way you want it and don’t want to receive any more over the air updates then you can easily turn them off. In most cases once you have rooted the Nook Color and changed the entire system to exactly what you want an OTA update could remove all your hard work and in some cases soft brick devices. If you want to stop OTA updates follow the instructions below to disable the built in update feature.

Turn off and Disable OTA Updates on the Nook Color:

  1. Download and Install SQLite Editor from the Market
  2. You do not need Root Explorer for this process
  3. Once installed reboot your Nook Color
  4. Open the SQLite app and let it scan your Nook Color to find databases
  5. Scroll down to “DeviceManagerService” and select it
  6. Select “devicemanager.db”
  7. Select the “registry” entry and look for entry labeled “fota.mode”
  8. Select “Auto” from the far right
  9. Go to the status bar at the bottom and tap the menu button
  10. Select “Edit Field”, you should now see a black screen with 1 entry
  11. Tap on “auto” and replace it with the word “manual”
  12. Select Done and then Save
  13. Reboot your Nook Color and thats it, OTA updates will no longer be forced.

There are free SQL editors out there although from our experience SQLite is the best we’ve used. If you do use a different one the process will still be pretty mush the same. If you have any issues of questions feel free to ask below.

Install a Custom Keyboard on the Nook Color

barnes noble nook color keyboard

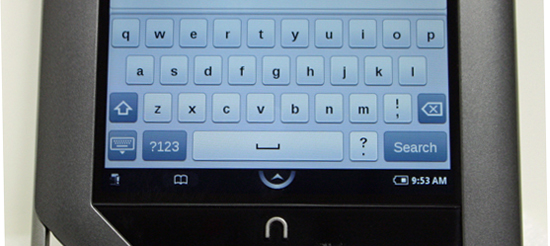
Most Android users take great pride in the fact that their devices can be customized entirely the way they want them to work. The Nook Color is no different, keep in mind you will need to root the device before installing a custom keyboard (in this case anyway) (Nook Color Root Instructions).  The Nook Color can have a custom keyboard if you want to change it from stock … there are just a few steps you need to follow:

How to install a custom keyboard on the Nook Color:

  1. Grab a file manager like ES File Explorer (if you don’t already have one)
  2. Go into the file managers settings and give it root access
  3. Set the root directory to “/”
  4. Download and install the keyboard app that you want from the market
  5. Open your file manager and go to “/data/app”
  6. Find the APK for the keyboard you just installed
  7. Long press the APK and select “Move” or “Cut”
  8. Navigate to “/system/app” and paste the APK there
  9. Exit your file manager and reboot your Tablet
  10. After the Nook Color turns back on go to “NookColor Tools”
  11. Select “Choose Keyboard” and select the Keyboard you installed
  12. Congrats you now have the custom keyboard on your Nook Color!

If you have any issues please feel free to ask questions via comments below. Otherwise just drop a line to let us know that everything went ok for you. Also if your installing Swiftkey of Swype be sure to open the app for the keyboard after the steps above to complete setup.

Android Tablet Fix for Market Missing Applications

Google Play Logo

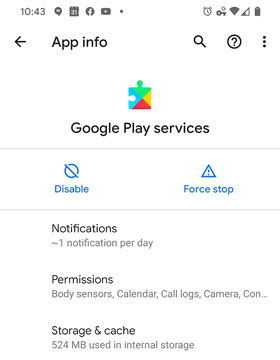
There is an ongoing issue with Android tablets and their ability to see all Android applications on the Market. Even now with the new Google Play your Android tablet will likely not see all apps when you search the market. You can make the tablet see all Android applications that your tablet can run easily by following a few simple steps.

How to Fix Limited Market Visibility on Android Tablets:

  1. Disconnect Tablet from PC if connected
  2. Go to your Tablets settings
  3. Go to “Applications -> Manage Applications”
  4. Select the “All” tab
  5. Scroll down to the Market and select it
  6. Tap “Force Stop” then “Clear Cache”
  7. Tap back (however your tablet allows)
  8. Scroll up to “Google Services Framework” and select it
  9. Tap “Clear Data” then “OK” then “Force Stop”
  10. Exit back to your home screen then open Google Play (or Market)
  11. If you get an error message its ok, Press “OK”
  12. Hold your Power button and turn off the tablet
  13. Turn the tablet back on and wait for it to load completely
  14. Open Google Play (of Market) and enjoy!

This seems to work on most Android tablets although we have had a few people say that they are still having issues. Please post a comment below to let us know if it works with your tablet and what tablet you have to help others. If anyone has additional questions please feel free to comment those as well.

How to Setup your Sony Android Smartwatch

Sony has released an Android powered watch that will allow you to control and use some of your phones features from your wrist. This Sony Smartwatch doesn’t actually hold the apps on itself but runs via a bluetooth connection with your Android Phone. Some of the benefits of the Android Smartwatch is the fact that you can see whos calling from your wrist, read text messages, see weather and of course the time without pulling your phone out of your pocket. There are many more features to the watch but here we will focus on syncing the watch with your Android phone.

Whether you have lost the setup instructions or just don’t want to read through them this is here for you. The smartwatch is easily setup and will likely be one of your favorite Android accessories.

Sony Android SmartwatchHow to Setup the Sony Android Smartwatch:

  1. Turn on your Sony Smartwatch, you will notice it trying to sync
  2. On your phone go to your wireless settings and turn on your Bluetooth
  3. On your Phone scan for devices, the smartwatch will show up on your phone
  4. Select it to pair with the device
  5. Verify the connection on both your phone and smartwatch
  6. On your phone go to the Android Market and Download “LiveWare Manager”
  7. Turn off your Smartwatch and Open Liveware on your phone
  8. Turn your Smartwatch back on and you will get a notification on your phone
  9. Say “OK” and it will take you to the Android Market, Download the Watch app
  10. Once the app is downloaded it will start on its own
  11. After a few seconds you will see the current time on your watch
  12. Congrats you are now synced!

Once synced you will see that there are no apps on the watch and it is literaly just a watch at this point. You can download apps by tapping the watch Manager in your notification bar. The video above will explain the steps above in a little more detail along with downloading your first few smartwatch apps. If you have any issues please feel free to drop a line below.

Backup and Restore the Barnes & Noble Nook Color Tablet

We all enjoy flashing custom ROMs, dual-booting, and just general hacking that can lead to everything but turning our tablets into paper weights. In the case of the Nook Color you can easily backup the stock ROM and restore it as needed to avoid destroying the tablet completely. You will need to use the ClockworkMod bootable micro SD card for the process but other than that its very easy to do.

How to Backup the Nook Color:

  1. Create a Bootable micro SD card with ClockworkMod (Instructions Here)
  2. Insert the micro SD Card into the Nook Color and Turn it on
  3. Once at the CWM menu use volume keys to navigate to “Backup/Restore” select with n
  4. Navigate the same way to “Backup”, press n to select
  5. Don’t worry if you see “No sd-ext found. Skipping backup of sd-ext”. Its not an error
  6. Once complete eject the micro SD card
  7. Choose “Reboot System Now”, press n to select
  8. Your Nook will reboot as Normal and your Backup is on the SD card.

How to Restore the Nook Color from Backup:

  1. Insert your Bootable micro SD Card into the Nook Color and Turn it on
  2. Once at the CWM menu use volume keys to navigate to “Backup/Restore” select with n
  3. Navigate the same way to “Restore”, press n to select
  4. Once complete eject the micro SD card
  5. Choose “Reboot System Now”, press n to select
  6. Your Nook will reboot as Normal and your Nook Color will be restored.

As always if you run into any issues feel free to ask questions here. Also if you have anything to add let us know that as well.

How to Root the Nook Color on Version 1.4.2

Rooting your Nook Color will give you full control over the device and its features, much like jail breaking an iPhone. Essentially, it lifts the limitations put on the Nook Color by Barnes & Noble allowing it to operate like any other Android tablet. A Nook Color which has been rooted can run apps and programs that are otherwise incompatible with its system on the stock ROM. The process while looking long is very easy if you follow all directions exactly.

Instructions to Root the Nook Color on Software Version 1.4.1 & 1.4.2:

  1. Make sure you have registered your Nook or Risk losing association with B&N
  2. Download all B&N content to be sure its not lost after Root
  3. Create a bootable ClockworkMod 3.2.0.1 microSD Card (Instructions Here)
  4. Download “Manual Nooter 5.02.19.zip” (Download Link)
  5. Copy the “Manual Nooter” zip file to the root of your micro SD card
  6. Unplug and turn off your Nook Color if connected to PC or on
  7. Insert the SD card with required files into the Nook Color
  8. Turn on the Nook Color and it should boot directly into recovery
  9. Select “Install zip from SD card” (volume down and n to select)
  10. Select “choose zip from SD card (volume down and n to select)
  11. Find the Manual Nooter zip file and select it (volume buttons and n to select)
  12. Confirm on the next screen navigating and selecting the same way
  13. Wait for the process to complete and remove your micro SD card
  14. Reboot the Nook Color (if you get an error on first boot just reboot again)
  15. Congrats your Nook Color is Rooted!

As always we aren’t responsible if you harm your Nook Tablet although if you follow the directions to the letter you will have no issues that we can see. If you do run into any issues feel free to leave us a comment below.

Create a Bootable ClockworkMod Micro SD Card

In this tutorial we will be showing you how to create a bootable ClockworkMod SD card for the Nook Color. The reason we are creating the example with the Nook Color is because we just happen to need on so might as well write as we do it. You will need the ClockworkMod bootable SD card to root the Nook Color using the Manual Nooter method so here it goes:

How to Micro SD Cardcreate a bootable ClockworkMod SD card:

  1. Download ClockworkMod version 3.2.0.1 (Download Link)
  2. Unzip the ClockworkMod file somewhere you’ll remember
  3. Download Win32 Disk Imager for the flash process (Download Link)
  4. Unzip Win32DiskImager and run the EXE file
  5. Click the blue folder icon and select the ClockworkMod file you downloaded
  6. Under Device select your SDcard
  7. Click Write to write the image
  8. Congrats you have a bootable microSD card for ClockworkMod!

If your creating a bootable SD card for anything else the process is still the same. If you have any issues please feel free to drop us a line.

How to Factory Reset the Motorola Atrix (Back to Stock)

The Motorola Atrix 4G is still a very fast quality Android phone, the only issue is the fact that it bogs down bad after heavy use. After you have had an Atrix 4G for about six months to a year it would benefit you to do a factory reset. You can easily format internal storage but to actually get the Atrix 4G back to the condition it was the day you bought it you need to do a hard factory reset.

NOTE: This will completely wipe the entire device including all apps, photos, videos, etc. Backup anything you don’t want to lose before doing the factory reset.

How to Completely Reset your Motorola Atrix 4G:

  1. Turn off your Atrix 4G
  2. Turn on the Atrix holding the Vol down button
  3. When you see fastboot at the top of the screen release the vol down button
  4. Press vol down until you get to “Android Recovery”
  5. Press power button to select “Android Recovery”
  6. Once you see a yellow triangle press both vol up and vol down
  7. Use Vol down to navigate to Factory Data Reset
  8. Press Power to select then select Yes to confirm the same way
  9. Wait for the process to complete and go back to the menu
  10. Press power to select “Reboot Device”
  11. Congrats once it reboots you will come to the MotoBlur screen!

If you have any issues please refer to the video above as well as leaving comments and questions below. I have completed this process more times than I can count and have never had an issue so its as safe as it gets.