CyanogenMod 9 Alpha 2 on HP TouchPad now supports Netflix

Since the release of the Android kernel source code for the HP TouchPad CyanogenMod has been hard at work. The CyanogenMod 9 (CM9) Alpha 2 build for the HP TouchPad now has Neflix support and streams very nicely on the build.  One of the features that users have been requesting for a while now was Netflix.  Now the previously useless HP Touchpad at least has one feature that people can use regularly.

While the camera and a few other things aren’t working on the CM9 Alpha 2 build for the TouchPad it is a very stable build for daily use. If you just have your TouchPad sitting around collecting dust you should head over to CyanogenMod’s website and grab the newest build.  You will notice bugs and force closes periodically so when we say stable we really mean as stable as you can find right now.

To be honest if you have a TouchPad still running WebOS then you are doing yourself an injustice by not flashing the CM9 ROM. If you decide to run or are already running the CM9 Alpha 2 ROM please let us know how Netflix is working on it and any other issues you may cross.  We are sure that CyanogenMod will continue working on the TouchPad ROM to get the thousands of you that took advantage of the nearly free TouchPad’s a working ROM.

We have an HP TouchPad and have been running the CM9 Alpha 2 ROM for a few days and feel that its coming along nicely.  Now instead of using the stock WebOS with nearly no apps available you can take advantage of the much larger Android Market to get use of your tablet.  Hopefully the TouchPad is a lesson learned by other manufacturers and they will take a little more time testing their OS in the event they don’t want to use Android and get it in a working order before release.

Install Ice Cream Sandwich (CM9) on the Motorola Photon

We want to thank the CyanogenMod team and Jokersax for all the work they have done to get a fully functional CM9 Android 4.0.3 Ice Cream Sandwich build ported to the Motorola Photon 4G. The CM9 build for the Motorola Photon 4G does have a few bugs but nothing that will effect its everyday use.  To Install ICS on the Photon follow the instructions below.

PLEASE WAIT FOR AN UPDATE TO THESE INSTRUCTIONS BEFORE ATTEMPTING.  IT SEEMS THERE ARE SOME KEY ITEMS THAT ARE MISSING.

Prerequisites to install CM9 on the Photon 4G:

How to Install CM9 on the Photon 4G:

  1. Download CM9 and move the zip file to your SDcard (Download Link)
  2. Reboot your Photon 4G into Recovery from ROM Manager
  3. When in Recovery select Wipe Data/Factory Reset
  4. Wipe cache and wipe dalvik cache
  5. Navigate to install downloaded zip from SDcard
  6. Choose zip from SDcard and select the ROM
  7. Reboot your Photon 4G
  8. Congrats your Photon is on CM9 Ice Cream Sandwich!

If you have any issues installing CM9 on your Photon let us know here and we will try to help you out. As always we are not responsible for the use of these instructions and you flash your device at your own risk.

Install Android 4.0.3 Ice Cream Sandwich on the HTC Sensation

If you just can’t wait to get Android 4.0.3 Ice Cream Sandwich on your HTC Sensation 4G nows the time and it comes with Sense 3.6. There has been an Ice Cream Sandwich ROM created by an XDA Developer named thelegendarylegends called Extreme Sensation that gives you everything you need.

The Ice Cream Sandwich ROM for the HTC Sensation is based on a leaker RUU version 3.24.401.1 and stable enough to be used as your daily ROM. Best of all you get HTC Sense 3.6 with the ROM with a few extra features like overscroll glow, semi-transparent app drawer, battery percentage meter and more.

How to Install Android 4.0.3 ICS on the HTC Sensation:

  1. Your HTC Sensation muss be Rooted with S-Off
  2. Make sure your battery is at least 80%
  3. Install ClockworkMod Recovery via ROM Manager (free on market)
  4. Put the Extreme Sensation ROM on your SDcard (Download Link)
  5. Place the 3.24 Unlocked firmware zip on your SDcard (Download Link)
  6. Place the “su-bin.zip file on your SDcard (Download Link)
  7. Reboot your Sensation into Bootloader “Vol Down + Power”
  8. When a screen comes up select “Bootloader”
  9. Select “yes” when bootloader asks for an update to install 3.24
  10. Wait for your Sensation to install firmware and reboot
  11. Connect your Sensation to a PC via USB
  12. Delete the 3.24 Unlocked Firmware file from your SDcard
  13. Disconnect your Sensation from the PC
  14. Open ROM Manager and select “reboot into recovery”
  15. When in recovery select “wipe data/factory reset” and confirm
  16. Select “wipe cache” and confirm
  17. Select “install zip from SDcard” and choose “Extreme Sensation”
  18. Wait for the phone to flash the ROM then select “reboot device”
  19. Once booted install “4EXT Recovery Updater” from the Android Market
  20. Install the su-bin.zip file via 4EXT Recover Updater
  21. Congrats you now have an HTC Sensation 4G running Android 4.0.3

As always we are not responsible for the use of these instructions although any issues you run into please feel free to ask in the comments below. Let us know if there are any steps that need more information added in your opinion and we will be sure to add them.

Install Android 4.0.3 Ice Cream Sandwich on the Kindle Fire

Ice Cream Sandwich on the Amazon Kindle Fire

Amazon released the Kindle Fire and had record sales of the device over the holiday season 2011 and now you can get Android 4.0.3 Ice Cream Sandwich on the device. One of the more popular ROM’s MIUI has been ported over to the Kindle Fire allowing the upgrade to ICS.

Almost everything works on the port to Ice Cream Sandwich but there is a small list of things that don’t currently work. The current features that aren’t working include tethering via USB, hardware accelerated graphics static wallpaper and themes. This being said everything that a daily user needs works just fine on the Android 4.0.3 MIUI ROM for the Fire.

How to Install Ice Cream Sandwich on the Kindle Fire:

  1. Install ClockworkMod Recovery via ROM Manager (Free on Market)
  2. Download MIUI to your Kindle Fire’s SDcard (Download Link)
  3. Make sure your Kindle Fire is disconnected form PC
  4. Open ROM Manager and tap “reboot into recovery”
  5. Select the “factory reset” option and confirm on next screen
  6. Go back to the main screen of recovery
  7. Select install zip from SDcard option
  8. Select the MIUI ROM zip file you downloaded earlier and confirm
  9. Once complete select “wipe cache” then select “reboot device”
  10. Be patient as the first boot will take a little time.
  11. Congrats your Kindle Fire is running Android 4.0.3 ICS!

If you have any issues or need anything explained in more detail please feel free to leave a comment below. We have tested this on the device and love the ROM. We will try to get a video of the installation up soon although did not record the previous process as it was on a users device that we don’t own.

Voice Action Remote for Google TV?

Google Voice Action Remote for Google TV

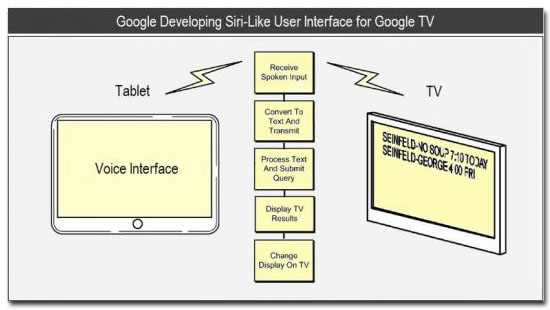
It looks like Google is developing a voice activated remote control for Google TV according to many sources around the net. Google filed for a patent last year for a remote and Android application that will use the Google Cloud assisted voice recognition technology for Google TV. This patent is for a device that will allow you to use your voice to navigate around the Google TV menus. Make no mistake that while being compared to Siri that Google has been working on these technologies since late 2010 with their Voice Actions.

The patent filing states that Google TV users will be able to talk to their Android powered device or special Google TV remote. The commands will then be sent to Google voice recognition servers to be analyzed and then sent to the Google TV unit for actions. This will also allow for control of the TV remotely to start programs before we ever get home so that everything is running when we get there. There will also be music controls and application commands included so that you can completely control the unit with voice commands.

the provision of the query to the television may occur when the user is within a set distance of his home also (e.g., by determining with GPS functionality on the smartphone that he is within 1/4 mile of the home), and the television may be turned on automatically as he approaches the home, with the television tuned to a channel that is determined to be most relevant to the query

Please let us know what you think about the new feature that Google will be including without the TV unit and if it will be useful or not for you. As we get more information and a release date is set we will be sure to let you know.

Chinese Court Bans Distributor’s from selling iPad’s in China

iPad sales Banned in China

At the Intermediate People’s Court in Huizhou, Proview International issued a statement through their attorney, that the Intermediate People’s Court issued a ruling banning distributers from selling iPads in China.

Proview claims that Apple is violating their trademark and that they own the rights to the name “iPad” in China. Carolyn Wu, an Apple spokeswoman responded to the lawsuit with the following:

“We bought Proview’s worldwide rights to the iPad trademark in 10 different countries several years ago. Proview refuses to honor their agreement with Apple in China and a Hong Kong court has sided with Apple in this matter,”

Despite the ruling in China there are a few distributors in China still selling the iPads. It has been said that Proview might be filing the same claims in the United States for $2 billion in damages over the trademark.

UPDATE: The ban in China was short lived as most of these litigations are and the ban never made its way to the United States although we are still watching the Apple battle from all ends.  Most of these lawsuits and/or filings tend to be from Apple and not against them although they are big issues for both sides of the table.  Hopefully we will see a day when this all ends and the innovation starts to take its place as it once did.  Apple may have been the first real smartphone (in our opinion) but there are alot of people in the game and its time that everyone just realize that mobile is a broad market with an incredible amount of competition.

How to Root Sony Google TV

Sony Google TV Root Instructions

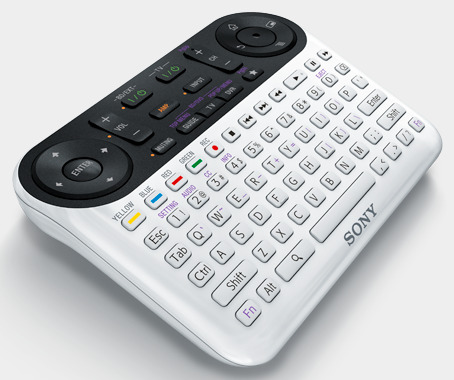
If you own a Sony Google TV unit then you can finally get root access on it, you will however need 4 usb memory sticks and a basic knowledge of your device. It does require you to flash the device although well worth it if you know what your doing. Kellex at Droid-life says:

“It does involve flashing your system back to a vulnerable software release which then hijacks the upgrade back to a current version to give you a new kernel and root access. That was a mouthful.”

The actual instructions can be found at:
http://blog.gtvhacker.com/2012/root-for-sony-google-tv-with-unsigned-kernels/

What Rooting your Sony Google TV will get you:

  • Modified flash plugin with random per box flash string for Content Provider Bypass.
  • Crippled update feature to prevent box from receiving automatic updates.
  • Completely RW system, cache, and rootfs partitions
  • Full ADB Root
  • Removed signature checks on kernel / init scripts / init binary
  • A few other surprises.
  • BETA: Enable NTFS Support for Sony Google TV devices (see wiki for instructions on how to add: GTVHacker.com: Sony NTFS)

The process is completely software hacking and does not require any changes to hardware. This will also speed up your Google TV noticeably. Please let us know if you complete the process and how everything went.

Install CyanogenMod 9 (CM9) on the Motorola Atrix 4G

First of all we want to thank the CyanogenMod team and Jokersax for all the work they have done to get a fully functional CM9 build ported to the Motorola Atrix 4G. The CM9 build for the Motorola Atrix 4G does have a few bugs but for most they will not even be noticed and I’m sure that the current beta build will be released as a stable build very soon as it works great.

Prerequisites to install CM9 on the Atrix 4G:

How to Install CM9 on the Atrix 4G:

  1. Download CM9 and move the zip file to your SDcard (Download Link) <- beta-0.1.0-2d-cm-9.0.0-RC0-Atrix-KANG-signed.zip
  2. Reboot your Atrix 4G into Recovery from ROM Manager
  3. When in Recovery select Wipe Data/Factory Reset
  4. Wipe cache and wipe dalvik cache
  5. Navigate to install downloaded zip from SDcard
  6. Choose zip from SDcard and select the ROM
  7. Reboot your Atrix 4G
  8. Congrats your Atrix is on CM9 Ice Cream Sandwich!

After you have flashed your device to CM9 you will need to install Gapps to get all of the Google Apps required to access the Android Market etc (Download Gapps).  You will flash Gapps the same way you did CM9 from steps 5 and 6.

If you have any issues installing CM9 on your Atrix let us know here and we will try to help you out. As always we are not responsible for the use of these instructions and you flash your device at your own risk.

And after the ROM is Installed this is what it looks like:

How to Root the Motorola Droid XYBOARD

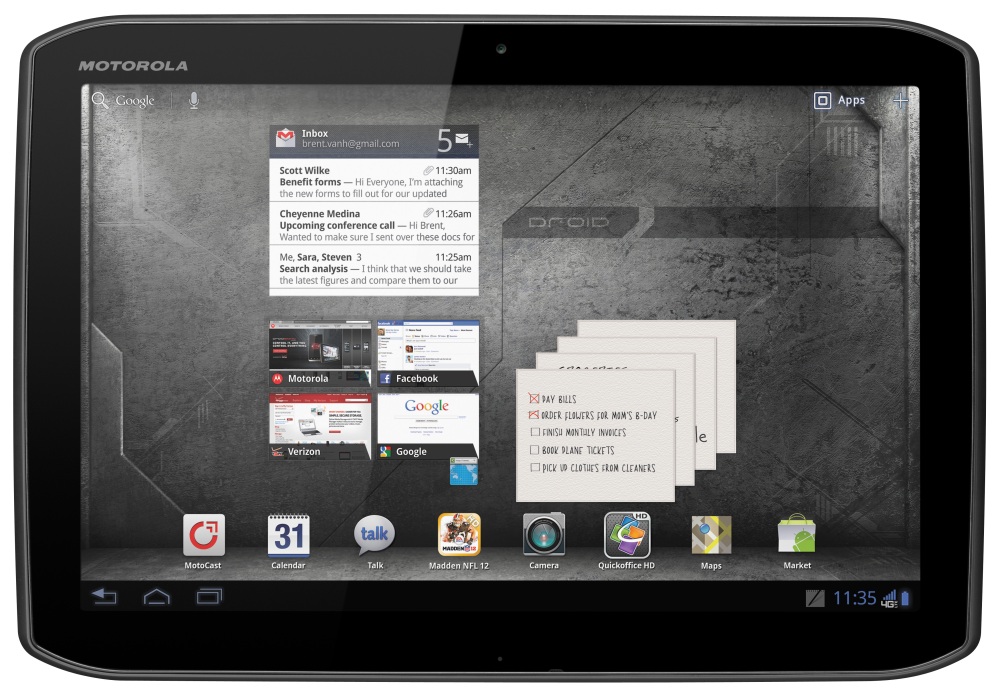
Motorola Droid XYBOARD Tablet

There is a developer named Dan Rosenberg that has been releasing roots left and right for Android devices and now added to that list is the Motorola Droid XYBOARD. The process to root the Motorola XYBOARD is very easy and requires one click.

One Click Root files for the Motorola XYBOARD:

  1. Download and Unzip the Root Files
  2. Windows Version: (Download Link)
  3. Linux Version: (Download Link)
  4. Put your XYBOARD in USB Debugging Mode “Settings -> Applications -> Development”
  5. Connect device to PC via USB
  6. Navigate to the location you unzipped the files above
  7. Run “run.bat” (or run.sh on linux) and follow any instructions if any
  8. Congrats your XYBOARD is rooted!

Thank you Dan Rosenberg for all of your hard work and those of you that find this exploit useful and use it to root your XYBOARD please consider donating to Dan via the donate button at http://vulnfactory.org/blog/2012/02/17/rooting-the-xyboardxoom-2/

Root the Motorola Droid 4 on Android 4.0.3 Ice Cream Sandwich

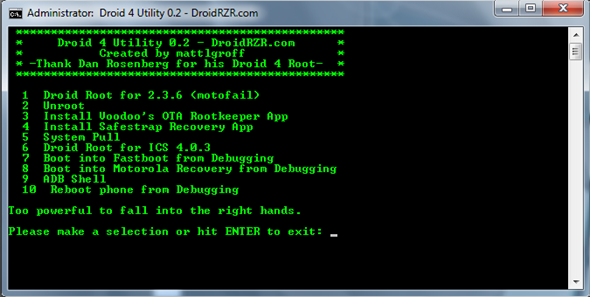
Motorola Droid 4 Root Utility

Our favorite group of hackers over at XDA, more specifically Dan Rosenberg has already created a utility to root the Motorola Droid 4 on Android 4.0.3 Ice Cream Sanwich. This utility will not only root your Droid 4 but unroot it, install Voodoo’s Rootkeeper app, Safestrap Recovery app, boot into fastboot for debugging and a few other options for the Droid 4.

This is a very easy utility to use and requires almost no thought process to gain root access on your Motorola Droid 4. Make sure you backup anything that you do not want to risk losing like pictures, videos, text messages, etc. Also you will need the correct drivers on your computer for your Droid 4 then its as easy as running the utility.

Instructions to Root the Motorola Droid 4 on Android 4.0.3 Ice Cream Sandwich:

  1. Place your Droid 4 in USB Debugging mode “Settings -> Applications -> Development”
  2. Connect the Droid 4 to a Windows PC Via USB
  3. Extract the Droid 4 Utility on your computer (Download Link)
  4. Open the folder you just unzipped and run “Droid4Utility.bat”
  5. When the Droid 4 Utility opens select option 6
  6. Follow any on screen instructions
  7. Congrats your Droid 4 is rooted on Android 4.0.3 Ice Cream Sandwich!