")


If you want to unlock the bootloader and root your new Nexus 9 then XDA Developer Chainfire has got you covered. Unlocking the bootloader and rooting any Android device allows you full control over it without limitation. This said please be careful as full control means the ability to brick your device if your not careful. Follow all instructions exactly and remember that this is for you information and we aren’t liable for any issues that arise from following the instructions.
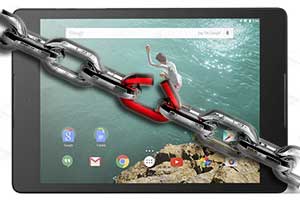 Before Rooting or Unlocking the Nexus 9 Bootloader
- Backup all files that you don’t want to lose as this will wipe the device
- Make sure your Nexus 9 battery is at least 50% charged (recommend full charge to be safe.
- Note: Unlocking the bootloader may void the devices warranty
Step 1: Install Nexus 9 Drivers on your PC
- The USB drivers for Nexus 9 are bundled with Android 5.0 Lollipop. Its preferable that you use the USB cable that came with the tablet.
- Connect your Nexus 9 to your PC via USB
- Wait for the PC to recognize the Tablet and driver installation will begin automatically.
- You will see several drivers install including the modem and MTP service.
Step 2: How to Unlock the Nexus 9 Bootloader
- Navigate to the settings app from quick menu or app drawer
- go to “About Phone” and enable developer options by tapping “Build Number” repeatedly 7 times.
- You should now see “Developer Options” under the “About Phone” menu
- Tap the Developer option to enable it and select “Enable OEM unlock”
- Next enable “USB Debugging”
- Download and extract “adb-fastboot.zip” where you can find it on your PC
- Connect your Nexus 9 to your PC via USB (If tablet not recognized see Step 1 above)
- If all is well at this point you may see a popup asking you to “Allow USB debugging on Nexus 9”, Press “OK” to accept.
- Open a command prompt window and navigate to the fast boot files you extracted earlier.
- Reboot the Nexus 9 into Bootloader mode by typing “adb reboot bootloader” and pressing enter
- if it does not reboot then Power down the Nexus 9 and then turn it on by holding the Volume down + power buttons for a few seconds.
- From the Fastboot menu use the volume buttons to navigate to “Fastboot Mode” and the power button to select it
- Once you are in Fastboot Mode go back to your command prompt and type “fastboot oem unlock and press enter
- On the Nexus 9 press the power up button to continue with bootloader unlock
- Once complete the Nexus 9 will reboot on its own automatically.
Step 3: How to Root the Nexus 9
- Download “Nexus9-root-SuperSU-v2.18.zip” root package and extract it to you rPC where you can find it.
- Copy all files from this to both your ADB folder and Fastboot Folder
- Make sure your Nexus 9 is connected to your PC via USB (if you disconnected reconnect it now)
- Boot into bootloader(fastboot mode) by again typing “adb reboot bootloader”
- Next boot from inject.img by typing “fastboot boot inject.img”
- Now to complete the root type “fastboot flash boot patched.img” (flashes the kernel)
- Last type “fastboot reboot” to restart the Nexus 9 and when booting up it will be rooted.
Now that your Nexus 9 has an unlocked bootloader and is rooted you will notice a new app in your app drawer. At this point you should check your app drawer for “SuperSU”. If this app is present it means all went well although if your still not sure if its rooted or not you can download “Root Checker” from Google Play and verify root access with it.
If you have any issues with the above bootloader and root process or notice anything that should be added or changed please let me know in the comments below. We should have a video available soon of the process for those that are interested.
 Review")
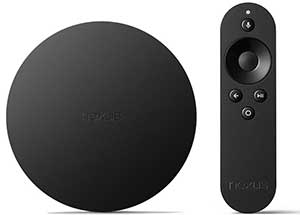 Google Nexus Player Design
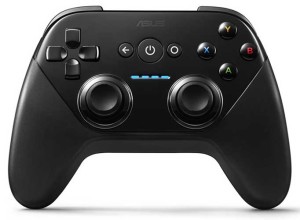 Google Nexus Player Game Pad
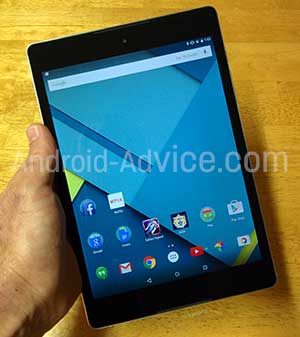 Nexus 9 Design
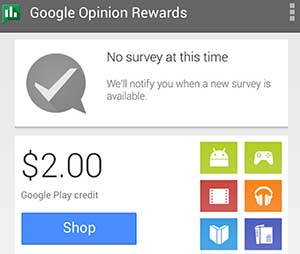 Google’s “Google Opinion Rewards” app is not a new application although its surprising how few people know it exists. Several people have mentioned they have seen mention of it lately and we figure now would be a good time to remind our readers that they can get free credits to use in the Google Play Store.
 We tried Wednesday morning to keep refreshing the order page and never saw it actually allow orders. Our assumption is that if Google’s not lying to us then the orders are literally open for such a short period of time that unless you visit at the perfect moment your out of luck. This said we will take a look next week and see what happens and you can always just pre-order the Nexus 6 from your carrier if you get too frustrated.
 Users must have a Disney account to use the service and any movies they unlock will be available on both iOS and Android as well as the DMA website. This service seems to be as seamless as possible cross device as well as user experience. The service covers close to 400 movies from Disney, Pixar and Marvel as well as a free copy of Wreck-it Ralph for new members that sign up and links an account.
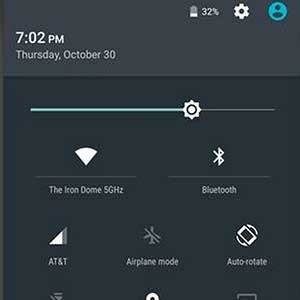 Before Android 5.0 Lollipop you could access these settings by swiping down on the notification bar and tapping a settings icon in the top right. You could also access these same settings by swiping the notification bar down using two fingers. This two finger method of accessing the Quick Settings is still present in Lollipop although the settings icon in the first method has been replaced with the User Accounts icon for changing users (a new feature in Lollipop for multi-users).
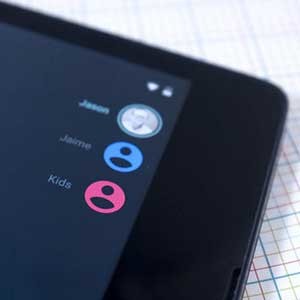 Google has integrated three different types of user accounts within the User Accounts setting being Guest accounts, Profiles, and User accounts. This works much like your average computer allowing different security and access levels. The different user account types are as follows: