Samsung and Barnes & Noble Partner for Galaxy Tab 4 Nook

It is official, Samsung and Barnes & Noble have partnered up to continue the Nook series of tablets under the name “Samsung Galaxy Tab 4 Nook”. This new Nook tablet will be based off the 7-inch version of Samsung’s Galaxy Tab 4 line. This said it means you will get a Nook that has the exact same hardware as the Galaxy Tab 4 with the Nook skin your used to on a Barnes & Noble tablet.

Barnes & Noble have stated that the new Nook tablet will be “designed for ready, with easy access to Barnes & Noble’s expansive digital collection of more than 3 million books, leading magazines, and newspapers.” This will all be a software based overlay replacing the Samsung Galaxy Tab 4 NookTouchWiz interface the current Tab 4 has.

Their goal here is to rebound the Nook name since the tablet market for B&N has been falling fast in revenues and customer usage. This partnership was nothing but a rumor back a few months ago although now with its confirmation we will likely see more exposure and interest in the new line of Nook. The brand recognition along from it being a Samsung device will likely create enough buzz to move B&N back into the Tablet market.

This 7-inch version of the Nook tablet is slated for an August release and will be available in physical and online stores. This said there has been no mention of price although if everything stays on track we will likely see either a $199 or $249 price point out of the gates.

With the hardware being nothing more than a Galaxy Tab 4 we will likely see a flash-able ROM to either boot from the Nooks SDcard slot as we see with its earlier versions or at a minimum a CyanogenMod ROM to completely replace the OS. The Android community with all of its brilliant minds will likely help create a name for the Nook even without Samsung’s name. If you notice anything new or have any questions about the Galaxy Tab 4 Nook feel free to leave a comment below. You can find the official press release announcement via the source below.

Honorbound Update 1.99.45 Adds Friending Feature

Honorbound is an RPG with so many features we aren’t going to list them all. This said, the developers, JuiceBox Games has released an update to their Android app putting it at version 1.99.45 that adds a few new ways to play. We have been impressed by the developers so far creating such an immersive game with rather regular updates.

There have been a few updates to the game that have caused less than desirable results although the most recent update has added a few features that the community has been wanting for some time. The most interesting feature is the ability to add friends within the game. You will now notice from your main screen an icon at the bottom between the Research and Arena tabs called friends. From there you can add friends, view your friends, and see the current referral rewards for friending.

Honorbound Friend CodesHonorbound Friending
You can now plug in a friends code to add them and play with them. This can either be solely for competition to see who can amass the greatest squad within the game or just to gain the benefits that friending gives you within the game itself. As people add you via your uniques friend code you can gain great rewards. The current friend referral rewards shown within the game are as follows.

  • 1 friend gets you 100 Diamonds (Premium Currency)
  • 3 friends gets you an Elite Rune for summoning Rare to Legendary heroes.
  • 8 friends will get you 500 Diamonds (Premium Currency)
  • 15 friends will get you a ring that increases your XP by 15% called the “Band of Eternal Essence”
  • 30 friends will get you an Elite hero called the “Armored Paragon”

If you are interested in becoming a friend with us as we actually do play this game quite often our code is “652-FKJF”. We would be happy to play with you in game. Another aspect of friending is gaining “FAVOR”. This allows you to summon exclusive heroes so you really want to be sure you are inviting active players to help with this faster over time.

Capture Traps also New!
Another new feature with the recent update is the implementation of “Capture Traps”. These can be gained from enemies, research, as well as purchased from the shop. What these capture traps do is increase your effectiveness of capturing heroes when in battle. If you have been playing Honorbound you know that the capturing of foes can be a very difficult task and this is just something to give you that edge you may need.

Last but not least is the addition of resistances and vulnerabilities to heroes. You will now need to be even more strategic when creating your armies as well as defending them in the future.

With all of these additions in the most recent update we will likely see the game grow even faster than previously. There are currently over 500,000 installations and it has seen a huge increase just over the past several weeks. If you are interested in the new friending, capture trap, or resistance features head over to the source link below and update your Honorbound game to version 1.99.45.

iOttie Easy Flex Qi Wireless Car Charging Mount Video

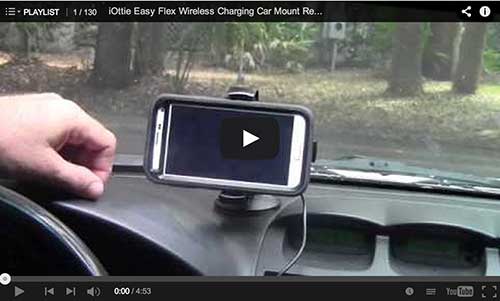
Hello this is Brandon with Android Advice & Tutorials, here we are going to do a quick review of the iOttie Easy Flex wireless car charger. The car charger when you first get it will come with this main unit, suction cup is kind of built on to it and a plug here that will plug into your car to give it power. You will also notice there is two little clips that you can use to actually route this cable around to wherever you want to put it in your car, it will come with two of those clips. OK, first thing you are gonna want to know is that the bottom is a very sticky rubbery kind of bottom, its almost like a suction cup but its more like a sticky pad like a 3M tape kind of thing. What you are going to do is your gonna place that where you wherever you want this to sit and then your going to take this plastic piece and push it down to tighten the suction. We have had this installed and it does just sit there and you can’t rip it off if you wanted to, you would break the front off of this before you could rip this off the dash. This particular dash is kind of like a leather and its textured so most suction cups just fall right off but this sticky bottom sticks really well which is a feature that we really love on this. What your going to want to do it find the spot you are going to want it, set it in place, and right there before you even push down on the lock its in place pretty well. So we will go ahead and lock it down by pushing that tab that we showed you earlier. And then once this is plugged into the car you will notice that this light here will turn orange, that means that it is ready. So now we have a Galaxy S5 and we have put a Qi wireless charging adapter behind the battery so that it wirelessly charges. So this is what we are going to test it with today. There is a section here. you’ll see this piece here, you can push the button on top and move this back and forth to fit with or without a case. Here we go, all you do, you’ll see a button here, when that button pushes it locks in place on your phone which is really nice. So its one hand operation although for the sake of the video i’m gonna use two hands so its clean and I don’t get in the way. You see there Wirelessly charging, it gives you that notification there as well as the battery here will show the lightning bolt within the battery showing that it is charging. So for the S5 it charges great instantly. We did test it a little while and it does charge about 70% as fast as say plugging it in directly although not having to plug it in is very nice and obviously why you are buying this particular mount over just a standard mount. Its a very strong mount, it swivels about thirty degrees in either direction so you can show it to passenger and driver. It will go up and down as well, there is like a ball kind of section on the back that swivels around. Then you have this main part that actually spins along the actual unit itself and you can spin it all the way around any direction you want. Perfect for GPS, perfect for putting up-right if you taking phone calls and you want to do it that way. Very great mount and one thing we wanted to test is testing it with a larger case. The largest case we could find is an Otterbox Defender case being the one with the largest back to it just to see how it charges with that, so lets put this in the case real fast. OK now that we have the case on the device you’ll see that its huge now and the back is a lot thicker than it was before. One thing you might need to adjust is this at the bottom here so we will set it in place and see what it does … not enough to the back … Oh! there it goes, it may just be off a little bit here but as you can tell it is charging and it is charging wirelessly with the thickest case we could possibly find, it adds a good bit to the back. Really this will work with any case you have, we do not have with us right now the Note 3 but it charges great, and a Nexus 5 charges flawlessly of course its built into that. Definatly recommend this mount. We had a chance to see it at CES and play with it there this year. The best wireless charging car mount that we have seen so far so definatly recommend it. We will have a written article in the description of this video as well as where you can get the charging pad adapter for the S5 and the iOttie Easy Flex mount as well. Thanks for watching.

Global Internet via 180 Satellites from Google in 5 years

A month ago their were reports of a project called Google Loon that promises to deliver broadband internet access and other wireless services to users via hot air balloons. This project says its to help service under served or emergency prone areas with connections that otherwise don’t exist.

Most recently the Wall Street Journal has reported that Google plans to spend between $1 and $3 billion dollars to create 180 small high capacity satellites that will extend internet access globally. This follows Google’s recent acquisition of Titan Aerospace, a drone maker that can deliver solar powered drones with a very long life span. These solar drones can stay in the air for up to 5 years at a time. Greg Wyler a satellite communications expert who is lead of the Google Loon project has a team of about 20 others to get this off the ground.

Google Satellite InternetThere isn’t much out there talking about what this means for consumers but the broadband service that it talks about mentions around 1Gbps which is something that most of the world would love to see available. Only time will tell if this will benefit the average consumer but we can only assume Google will find a way to make a little free and charge for more. The crack dealers they are will again make itself known.
Based on all estimations and reports the satellites/drones will take around 5 years to construct and launch. This means that Google will have the 180 satellites in the air by 2019 and have the potential to control the wireless broadband market as well as hurting if not replacing cell service providers. We will be awaiting information on the impact to hundreds of major companies around the world not to mention the thousands of others this could impact.

We are Google advocates although there is room to wonder with all of Googles expansion and money how much further will they go to gain control of every tech based industry in the World and will anyone step up and try to compete. The closest thing we have seen is Facebook’s efforts to explore drones, satellites and lasers to connect people on a larger scale but this could mean the end of towers and hotspots forevermore.

As more information comes available as well as consumer services once announced we will be sure to keep you updated. This said the timeline could mean a few years before we know much more than what we have here.

UPDATE 6/11/2014 – It seems Google is still trying to increase resources to keep Project Loon on track.  They have just acquired SkyBox Imaging to improve Google Maps through new technology and patents as well as speed up growth of their Global Internet access goals through Project Loon.  This is what Google said about the acquisition:

“Skybox’s satellites will help keep Google Maps accurate with up-to-date imagery. Over time, we also hope that Skybox’s team and technology will be able to help improve Internet access and disaster relief — areas Google has long been interested in.”

As always we will let you know as more comes available but this most recent SkyBox purchase could prove useful in global internet although in the short term we may see Google Maps improvements that will put it on top be a long shot.

Samsung’s first Tizen phone begins their move from Android

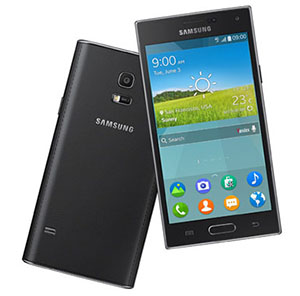
Samsung has been teasing prototypes of their new Tizen device to start there severance from Google’s Android platform. Today they have announced the release of the first ever Tizen smartphone the “Samsung Z”. Other than their Gear 2 smartwatch this is the first device they have released using their very own homegrown OS to start moving away from Google and starting their own mobile empire.

It seems Samsung is trying to grow in much the same way Google does with its Android OS. Gaining revenue from the apps that are sold on the Tizen market at 30% of every download could prove an income generator worth the risk assuming Tizen actually sticks. This said they have a lot of work to do if they are going to gain adoption of current Android users without offering the Android market.

Samsung Z smartphoneWhile Tizen has been created specifically as Samsung’s internal baby for new devices they have been working on the Tizen software jointly with Intel. What we know so far about the new Samsung Z is it will feature the following:
  • 720p HD AMOLED display
  • Quad-core 2.3GHz Intel CPU
  • 2GB RAM
  • 16GB of internal memory
  • 8-megapixel camera
  • Heartrate sensor and fingerprint scanner

While these are the features we can assume layout to be close to its Galaxy S line of devices with the app drawer, home screen, notification tray and widgets bing pretty much inline.

What we have been told by Samsung so far is that the device will launch in two colors being black and gold on June 3rd at their Tizen Developer conference in San Francisco. Once released it will be available in Russia and surrounding markets first with no confirmation on other markets yet. We have also heard no word on the price or US market releases.

One assumption we can come up with depending on its release price is that in the US they may have trouble since there are so many alternatives available. Samsung has been a top brand when it comes to Android devices although if we learn anything about Samsung’s past they will likely start a war that will hurt if they try to break up with Google too quickly.

Let us know what you think of Tizen and if its something you may actually buy to check out. As we get more information on the new OS based device we will let you know.

How to use the Galaxy S5 Toolbox Feature Video

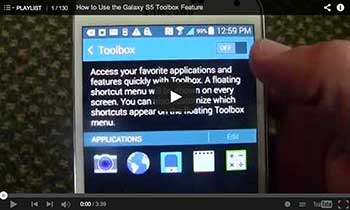
Hi this is Brandon at Android Advice & Tutorials, here we are going to show you the Toolbox feature on the Galaxy S5. Cool little feature to help you quickly get to things on your device without having to find it on a specific screen. To get to the Toolbox settings what you are going to want to do is pull your notification bar down and tap the settings icon. Then scroll down until you get to Sound and Display, at the bottom of Sound and Display you will see Toolbox. So lets go ahead and tap that. Now within the Toolbox screen you see you can turn it on and off, right now it is off and you don’t see the little icon on any of the screens. So what we will want to do first is go ahead and turn it on and you will see that Toolbox icon pop up right here. From there you can look down and see the applications that you want in your toolbox. Lets go ahead and edit this and here you can see all of the applications on your device that may like to have show up within that toolbar. There are certain things that you may want, lets say you want maps. You can only have a certain number in the Toolbox so you will have to turn one off to turn maps on. I believe five is the limit. Lets say you dont really use your … calculator, camera seem to be good, internet generally use the browser often, maps are used pretty regularly. Voice recorder you may not use so lets go ahead and scroll up and see … you want to use music. So now from here now that you have done this up at the top you will see “save” or “cancel”, we want to save that and you will see within the screen its now all of the icons that you would like to use and they are all listed here. From there we can go ahead and exit out of here and you will see that icon up here stays there and from any screen we can tap it and it brings up that list within our toolbox. Then if we want to get to it quickly we can just tap it there, do what we need to do and if we want something else, say camera you get to that camera quickly. So you have your toolbox within most things, if you open up an app that icon will not show up in the foreground of most apps, some standard apps on the device it will. So lets say you get tired of it getting in the way and there are things up in the corner that you don’t want covered or are having issues with you can remove it or actually move it on the screen somewhere else that you may not touch as often. Lets say here, nothing usually shows there on your screens themselves widget wise, so you can set it anywhere you want and it will actually show the icons. Thats how to use it and if you decide you don’t want to use it anymore again you can grab it and remove it that way (like a widget) and turn it off. If you decide you want it again you can go back to settings but you can also come back to settings where you originally turned it on and turn it off there. So thats that, hope that helps, the Toolbox is a really handy feature. If you have any questions about it or anything I missed that you want to bring up and want more detail on just let us know at Android Advice & Tutorials or you can leave a comment in the description of this video. Thanks for watching.

Galaxy S5 OtterBox Defender Case review, install and removal Video

Hi this is Brandon with Android Advice & Tutorials here we are going to do a quick review on how to use the Galaxy S5 with the Otterbox Defender case. The Otterbox Defender case is a very very protective case. Now after using it for a while we do not recommend it unless you just work in an environment or are in an environment where your phone is going to take a beating because it does bulk up the phone quite a bit. So here it goes, we have our Galaxy S5, very thin device that feels great in your hand. So lets go ahead and put this into the case itself and see how this all works. Basically what you are going to want to do is grab the hard outer back shell and set your device in that first. And then the second piece is a screen protector that clips to the back part. You will notice there are clips on the side here that will hold it in place. So, you are going to want to set that in on one side and then push down all the way around, there will be one clip on the top, two clips on either side, and there is two clips on the bottom. And when you squeeze all that together you will hear it pop in place. Just look all the way around to make sure it is in there good and snug. And then you have your outer rubber shell that kind of takes the impact. Basically what you are going to do with it is slide in the top first because it has got this flap and then go all the way around it and slide it up, slide it around. Then you will see that it doesn’t go around the bevel here, you have to push it and roll it over the bevel and it actually clips in place. The rubber on the inside has a part that goes down and it will seal it off and hook it all together so its good and clean. So now it is completely covered and you will notice this case makes this device huge. Do not like that because it takes the look and feel of the phone and completely removes it but like I said its very protective. The phone weighs a little over twice what it did without the case. Wireless charging if you have the pad … the adapter in it, there is a charging receiver that you can get will work through this case. You want to make sure that you use a charging pad that isn’t one of those cheap ones you can order anywhere under twenty different names. The case itself is nice other than the bulk, it has all the cutouts you need so you can use your IR blaster, access your headphone jack easily, and adds a little more protection with the water as well. The water proof feature of the S5, perfect cutout around the camera being raised enough that you can set it almost anywhere without having to worry about scratching up your camera. Perfect cutout for the speaker as well as a large cutout at the bottom so you can open the flap when you are charging via USB it opens all the way without getting in the way. So overall the power button clicks pretty easily, its separate from the rubber so, there is rubber over it but the plastic piece on the inside does not touch the power button so it allows the rubber piece click very easily. Same thing volume buttons, volume up, volume down you can hear it click. Openings for the from camera and sensors are all clean as well as the bottom area. The raised bevel is a very raised bevel so you can set it face down just about anywhere and not have to worry about it. For protection this is probably the best case that we have ever used for any device although for keeping that stylish look and feel, you lose it with this case. Hope that helps when you are looking to purchase it or even installing it as we’ve had a few people ask us about that. Removal is very easy, for removal you are going to want to grab the headphone cover first and go ahead and pull that up and out and that makes removal easy. You can grab it anywhere and yank to try and get it off but this is the easiest way to do it and you can just peel this off, put your fingernails under the clips and pull it off. Its a relatively easy process but it is time consuming. Hope that helps when your looking at purchasing a case and we will have other case reviews here soon and we probably give this case away here shortly as well. Thanks for watching.

How to Reset the Galaxy S5 to Factory Settings Video

Hi this is Brandon at Android Advice & Tutorials and here I am going to show you how to factory restore your Galaxy S5. There is two different methods, one of them is if you cannot boot all the way into Android and the other one is from within the Android operating system. So lets start with the first method which would be the recovery mode. How you get into recovery mode is with the phone off you will want to hold down the power button, volume up button and home button at the same time. So we hold them all down until the device powers on and you will see text up here and you can let go as soon as you see that saying recovery. Ok, we are now in recovery mode and now you will see options. Your options are to reboot, update from ADB, this that and the other. What you will want to do is wipe the cache partition first, you will use your volume buttons to navigate so arrow down to “wipe cache partition” and hit power to select. Wiped, it shouldn’t take very long and then select “wipe data/factory reset” power button to select it and then its going to make you confirm so arrow all the way down to “yes, delete all user data” and power button again to confirm. Then you will see it actually do the process, devices that don’t have much on it will be faster like that (this is just a test device). Then select reboot system now by hitting the power button to select that and we will go ahead and boot up into the OS. And there we are as if we turned it on for the very first time. So lets run through here so you can see how we do this without and just run through setup real fast. (This is an AT&T device so thats where some screens are coming from you may not actually see) Now from within the Android operating system what you will want to do is go into settings by pulling down your notification bar and tapping settings. Now scroll all the way down until you get to “User and Backup” and tap “Backup and Reset”. If you want to back everything up you can, just check that. It is only certain things that it backs up being just your basic settings, your contacts and things like that. Now tap “Factory Data Reset” and then “Reset Device”. You will get one final confirmation that says its going to delete everything and you cannot get anything back. Next it will ask you to create a password, this is not entering a password its just creating a new one. Then the device will reset and do the factory reset. Now if you want more detailed backup instructions just let us know and we will walk you through what you specifically want to backup but for the sake of this video since its just a factory data reset we are skipping that. And there you go, once again back to factory settings. Basically if you are going to sell the device or giving it to someone else or you just want to wipe it out to start over those are the two methods. Hope this helps, if you have any questions come see us over at Android Advice & Tutorials and let us know, or ask on Google Plus as we will likely respond a little faster there. Thats it, thanks for watching.

iOttie Easy Flex Wireless Car Charging Dock Review, install, and Demo (Video)

While there are many Qi enabled wireless car mounts coming out recently the best by far is the iOttie Easy Flex Qi Wireless Charging mount for Smartphones. We have reviewed a few different car mounts in the past and this is the first one that I am leaving in my car since it works with any Qi enabled device and actually sticks to my textured dash without any fear of it falling off.

iOttie Easy Flex Qi Wireless Charging Mount Design
When it comes to design they deserve every award they have been granted as it is a solid mount that moves in any direction you need easily. The mount is made from a solid plastic that you can yank on without fear of breaking with ever flexible join being tight enough to hold in place without having to manually tighten anything by hand. The face of the wireless charging mount spins 360 degrees clicking every degree to hold it in place in the orientation that best suits your needs. The front also folds up and down with a ball joint to allow 30 degrees left and right to be viewed from anywhere in the car.

The most impressive design feature of the iOttie Easy Flex is its suction cup, its not your standard suction cup and does not require an additional piece to be glued to textured surfaces. The cup is a sticky 3M style rubber pad that sticks securely to any surface before ever locking it down. This give peace of mind that the mount will never fall from your windshield or dash after installation. In fact when removing the mount you unlock the pad by lifting the locking lever and then you still have to use some serious force to actually remove it from the surface you have it stuck to. We removed the mount several times and reapplied without any loss in strength so have no doubt that the mount will last a very long time.

iOttie Easy Flex Qi Wireless Charging Mount Function and Features
Galaxy S5 Wireless Car ChargerThe wireless car mount easily locks your device in place via its unique build. There are arms on either side that lock together when setting the phone on the dock. These arms are padded to not only grip the device firmly but also keep from damaging your case or phone. There is a small adjustable arm at the bottom of the mount that allows you to position any size phone to hit the wireless charging area easily and center your device to secure it better. There is a small light on the side of the charger to show orange when its getting power and green when its charging your device so you never have any question if its charging the device.

I have to say the most impressive part of the function is the fact that when we placed a Samsung galaxy S5 on the charger using a Qi Wireless Charging Receiver it still charged the device with no issues. But after putting the Galaxy S5 in an OtterBox Defender case (thickest case to test) the iOttie Mount still charges the device with the added thickness. This means that any case you attempt should charge the device no problem. We would note that with such a thick case there is a delay in starting to charge and it likely charges a bit slower than thinner cases.

Conclusion
The iOttie Easy Flex Qi Wireless Charging Car Mount is a great wireless charging car mount that costs around $100 USD. Even with this price point we feel its worth the money since it will work with any Qi enabled phone you have now and any one you may have in the future. ITs the one car mount you will never have to or want to replace. If you have any other questions about the mount feel free to ask otherwise check out the Video below to see our installation and review of the iOttie Easy Flex Qi Wireless Charging Car Mount.

If you are looking for the wireless charging adapter for the Galaxy S5 used in the video you can find it at Mobile Fun its ultra thin and fits without adding the bulge that other adapters seem to add.

What to check when buying a used Android phone

When you purchase a used Android phone it can sometimes be scary not knowing if something is not working until well after you and the seller have parted ways. There are however many things you can check to be sure that you are getting a fully functional device. We will layout everything you need to check and how to check each part.

First and foremost do an LCD test by entering (*#0*#), this will tell you any issues you have with Bluetooth, GPS, NFC and other sensors. If all of this seems well then continue to the checklist below. The list is in no particular order and you will not likely be able to check everything if you are standing there with the seller although choose the items that are most important to you and check the others later.

  • Check the device for visible imperfections – If you were expecting a like new device then you will want to look over it and be sure there are no cracks or deep scratches on the screen. One part that people are less likely to notice right away is the camera lens. You will want to not only look at it but also open the camera app and look through it to make sure that the camera doesn’t show any imperfections or blur.
  • Power on the device – This seems obvious but turn it on and make sure that everything looks to be functioning at first so that you can be sure that it at least boots properly. You can watch the screens to be sure that nothing odd comes up as well as pixelation that you may not notice with the device off.
  • Check Recovery – There are many different ways to check your Android phones recovery for custom setups by powering off the device and then turning it on by holding power + volume up. There are some devices that may have another method so look that up before your ready to test the recovery. If you were expecting a stock recovery then you will see that here otherwise you will see something like ClockworkMod recovery in which case you will have to determine if it is what you were expecting.
  • Check Network Connection – The most important thing you can do is make sure that your device does work with your network. This is of course easiest with a SIM card if your carrier uses them. Power off the device and insert your SIM card or a friends that is on the same network and turn the device on. Then you will need to make sure you are getting a signal for calls as well as your data connection is working properly. You can test data by just doing something as simple as opening your web browser and making sure you can get to a page. If you have a CDMA device like Verizon or Sprint there are many services like checkesnfree.com to check the device to be sure its not reported lost or stolen with a Bad ESN.
  • Check Physical Connections – The biggest thing that you will likely find wrong with a used device is the headphone jack as it has happened to us on more than one occasion. Plug in some headphones and listen to a few sounds on the device. If there is no music on the device as there may not be you can go to call settings and check it with the ringtones.  Next plug the device into a computer or wall adapter via USB to make sure it charges.
  • Check Custom ROM Installs – from a powered off state in most cases you can hold the power + volume down +volume up buttons to enter into download mode. Once in download mode you will be able to see how many custom ROM’s have been installed. This is generally useful if you have a new device and want to be able to use the manufacturers warranty in the event the device has hardware issues. Custom ROM installations will void some warranties depending on manufacturer.
  • Check Loud Speaker – Again like the headphones you will want to make sure that your speaker works properly. You can again go to ringtones if there is no music on the device and check there. Just listen for any crackling or buzzing as well as actual sound coming out.

Again it will be very difficult to check all of this with a seller standing there with you although connections and things can be tested rather quickly. Also if you have purchased the device via Ebay or some source that you have the time to spend checking everything it is recommended before leaving feedback. Please leave us a comment below if there is anything we have missed or thought to be a good addition for buyers to keep in mind.